
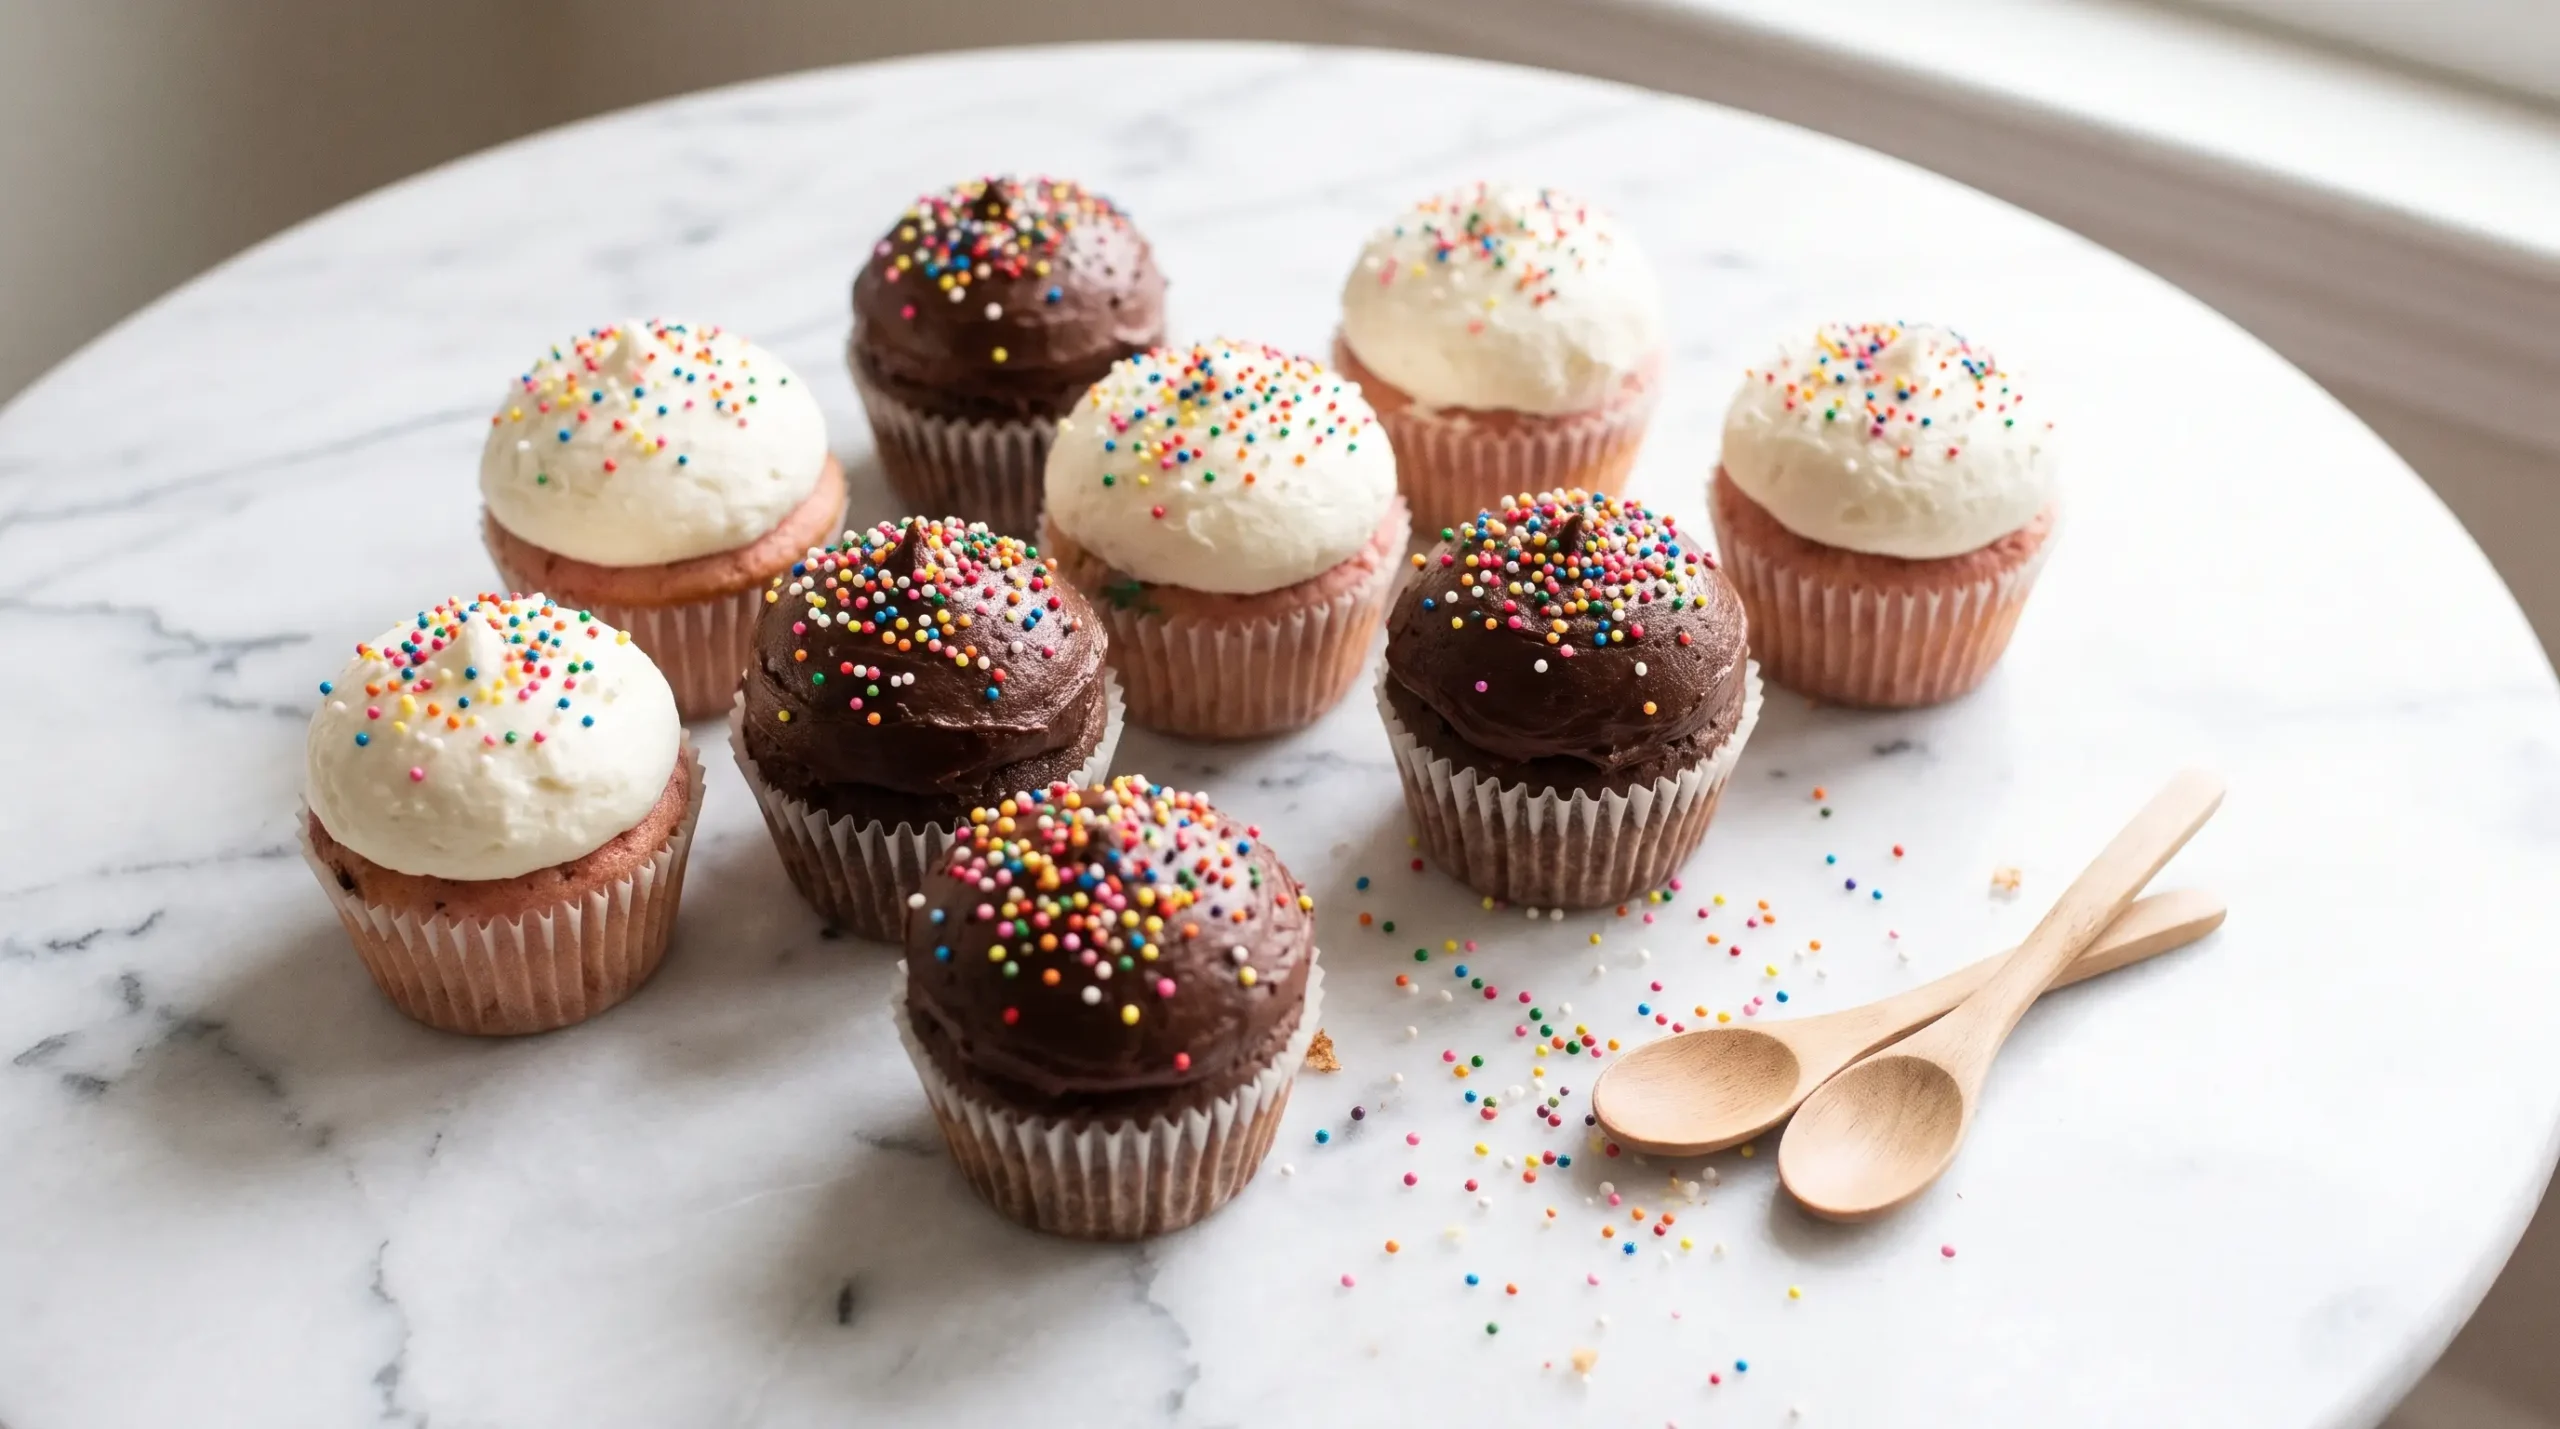
Making these at home saves a trip to Costco, and the math favors homemade.
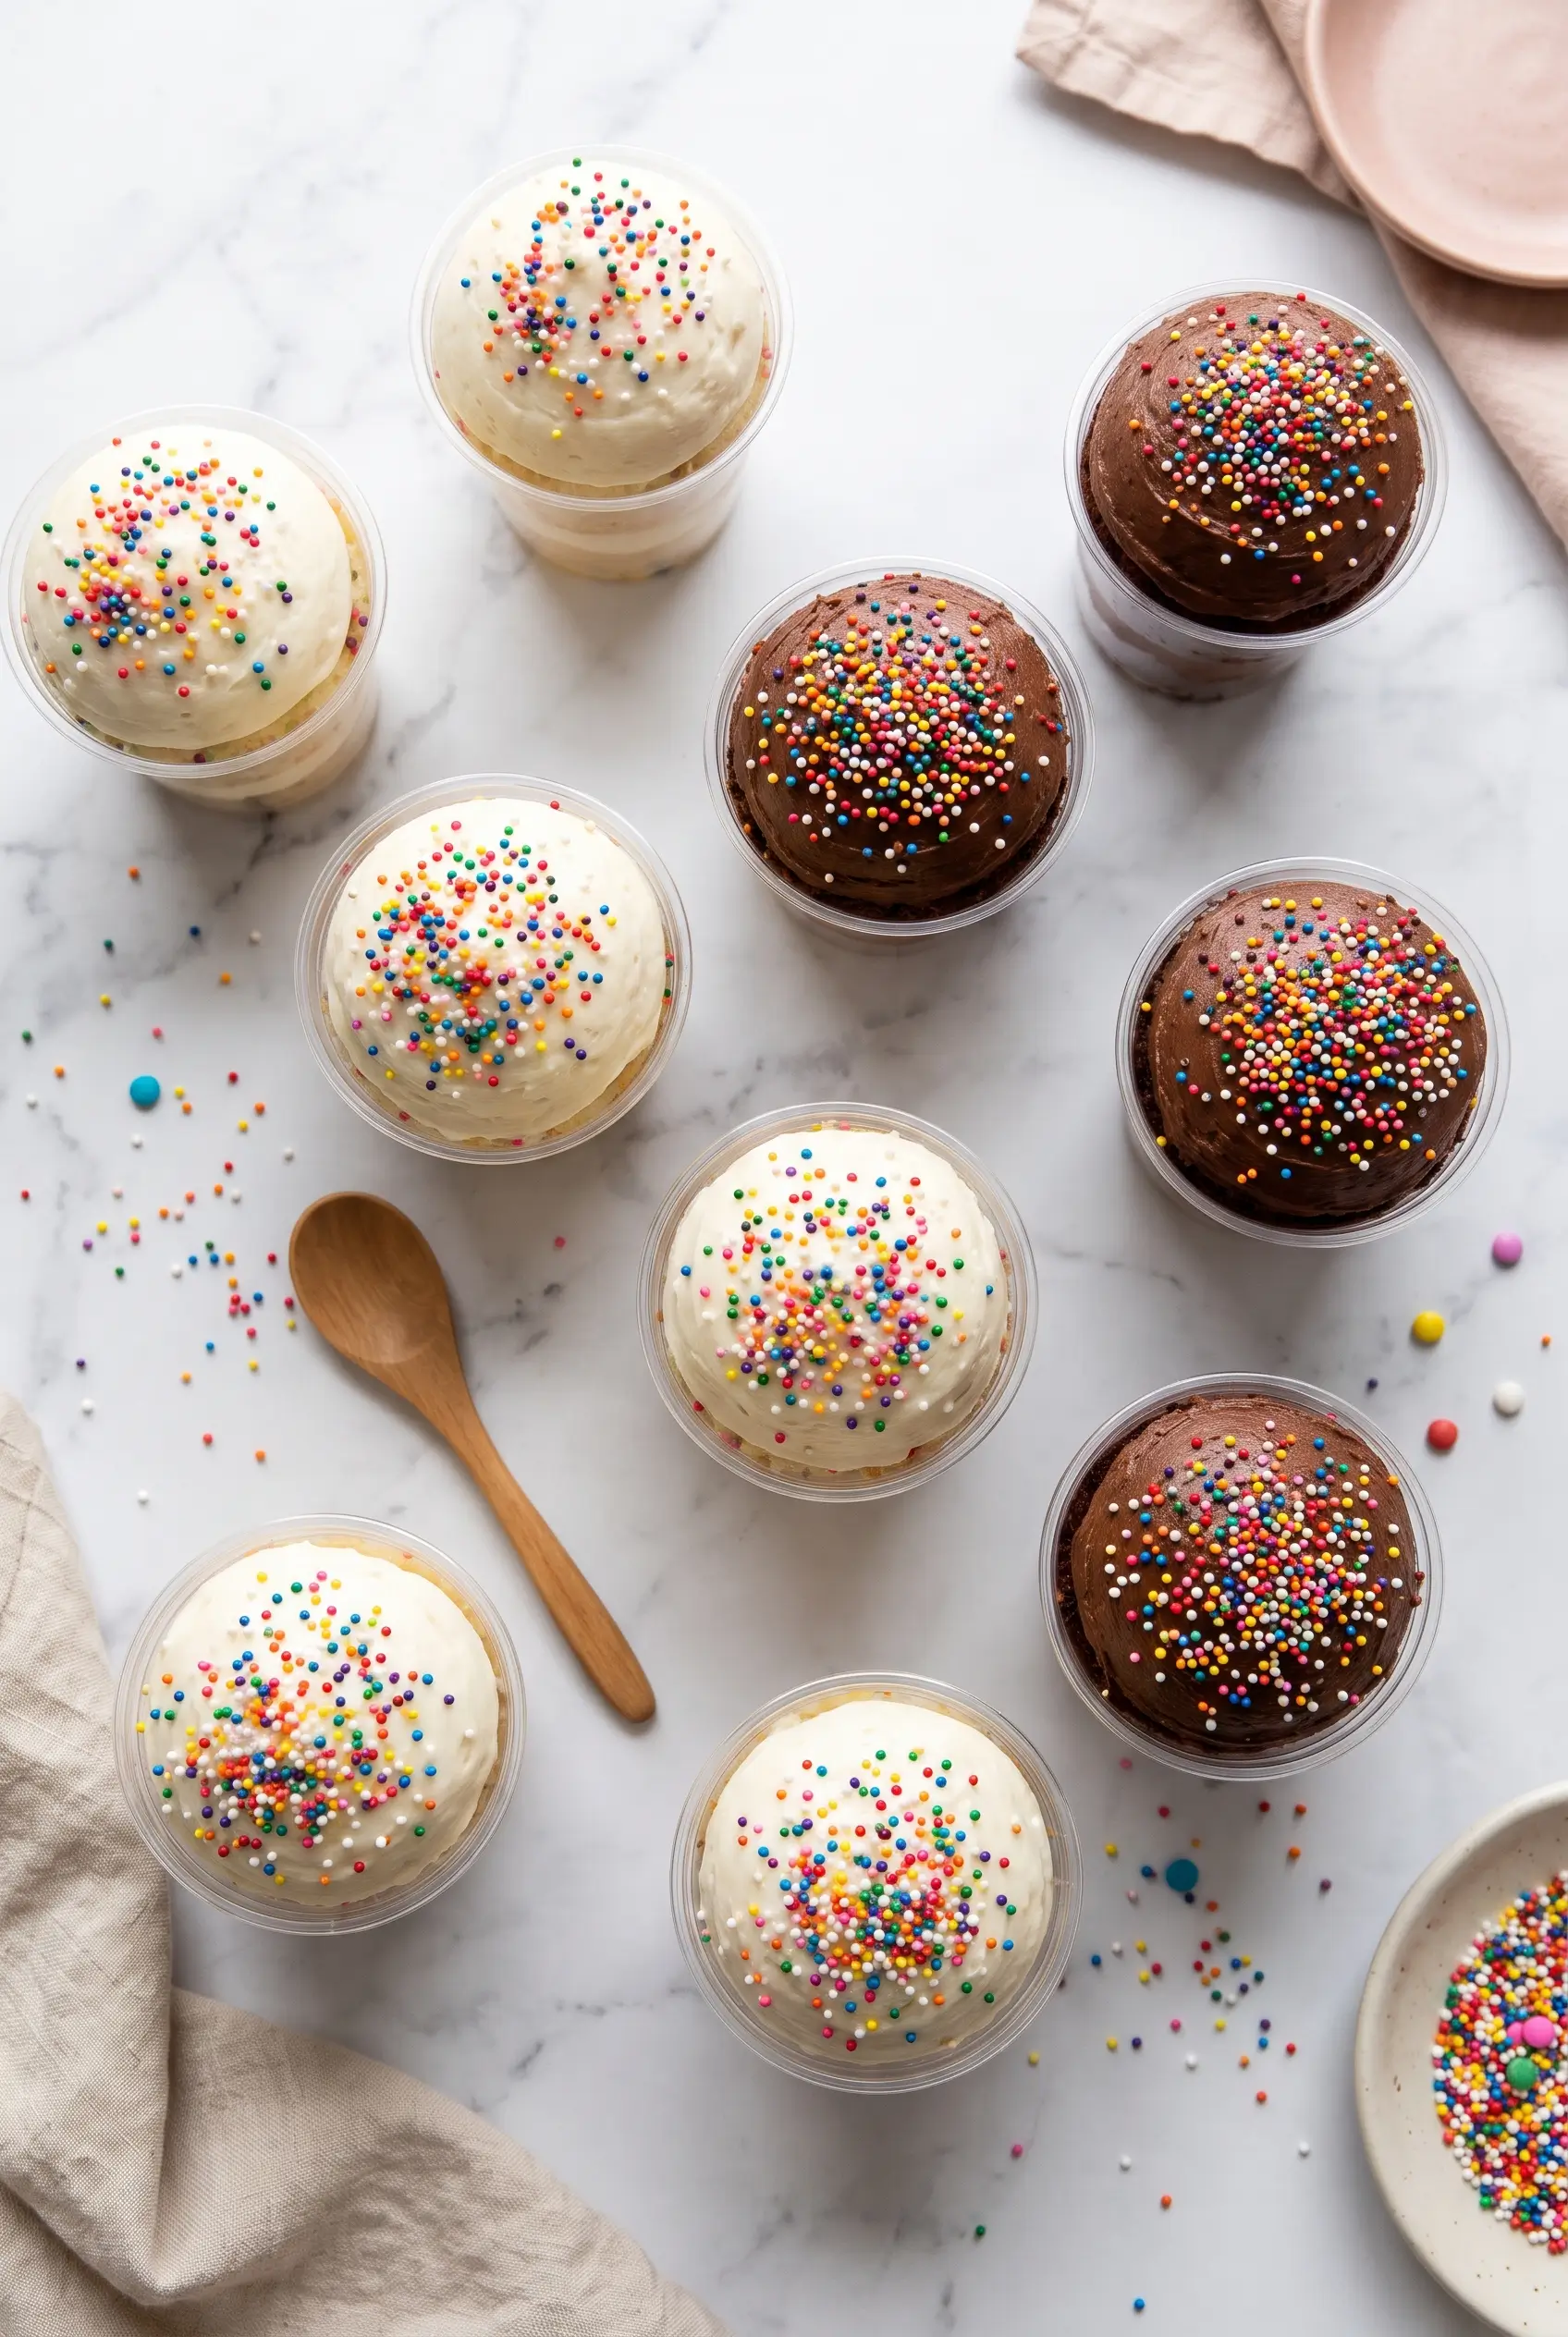
A six-pack of dot cakes costs $14.89 at Costco. Six cups at the Manhattan counter would run you $66.00, assuming you were allowed to buy six, which you are not — there is a two-per-person limit. Six homemade cups cost about $5.59 in ingredients. That is 78 to 93 cents a cup, and the batch takes twenty minutes of actual work.
The sponge is softer than the store version, because fresh cake always is. The crust cracks exactly the same way. And unlike the store version, you get to decide how thick the sprinkle shell goes.
If you would rather just buy them and you are not sure which stores carry them, I mapped out where dot cakes are sold near you separately. If you are staying in the kitchen, here is everything that matters — including the two details most recipes online get wrong.
What this recipe gets right that others miss:
- Two cutter sizes, because the cups are conical and one diameter leaves gaps against the walls
- A 2-hour chill, which is what creates the hard crust and the cracking sound — skip it and the sprinkles sit loose
- Oil plus butter plus sour cream, so the cake is still soft straight out of the refrigerator
- Nonpareils never touch raw batter — this is the mistake that turns a cup grey
Why Make Them Instead of Buying Them
Here is the arithmetic, using Walmart shelf prices:
| Option | Total | Cups | Per cup | Per ounce |
|---|---|---|---|---|
| Homemade | $5.59 | 6–8 | $0.78–0.93 | ~$0.21 |
| Costco six-pack | $14.89 | 6 | $2.48 | $0.55 |
| Butterfield Market, NYC | $66.00 | 6 | $11.00 | $1.38 |
One boxed mix, one tub of frosting and one bottle of sprinkles gets you between six and eight cups depending on how deep you build them. Even at the top of the ingredient range — $6.27 if you buy the chocolate mix as well — you are under half the Costco price and under a tenth of the Manhattan price.
The honest counterpoint: the Costco six-pack takes zero minutes and comes in lidded cups that stack in the fridge. If your warehouse has them in stock and you need dessert tonight, buy them. This recipe is for the other 37% of warehouses, for anyone outside the US, and for everyone who wants eight cups instead of six because there are nine people coming over.
What You Need
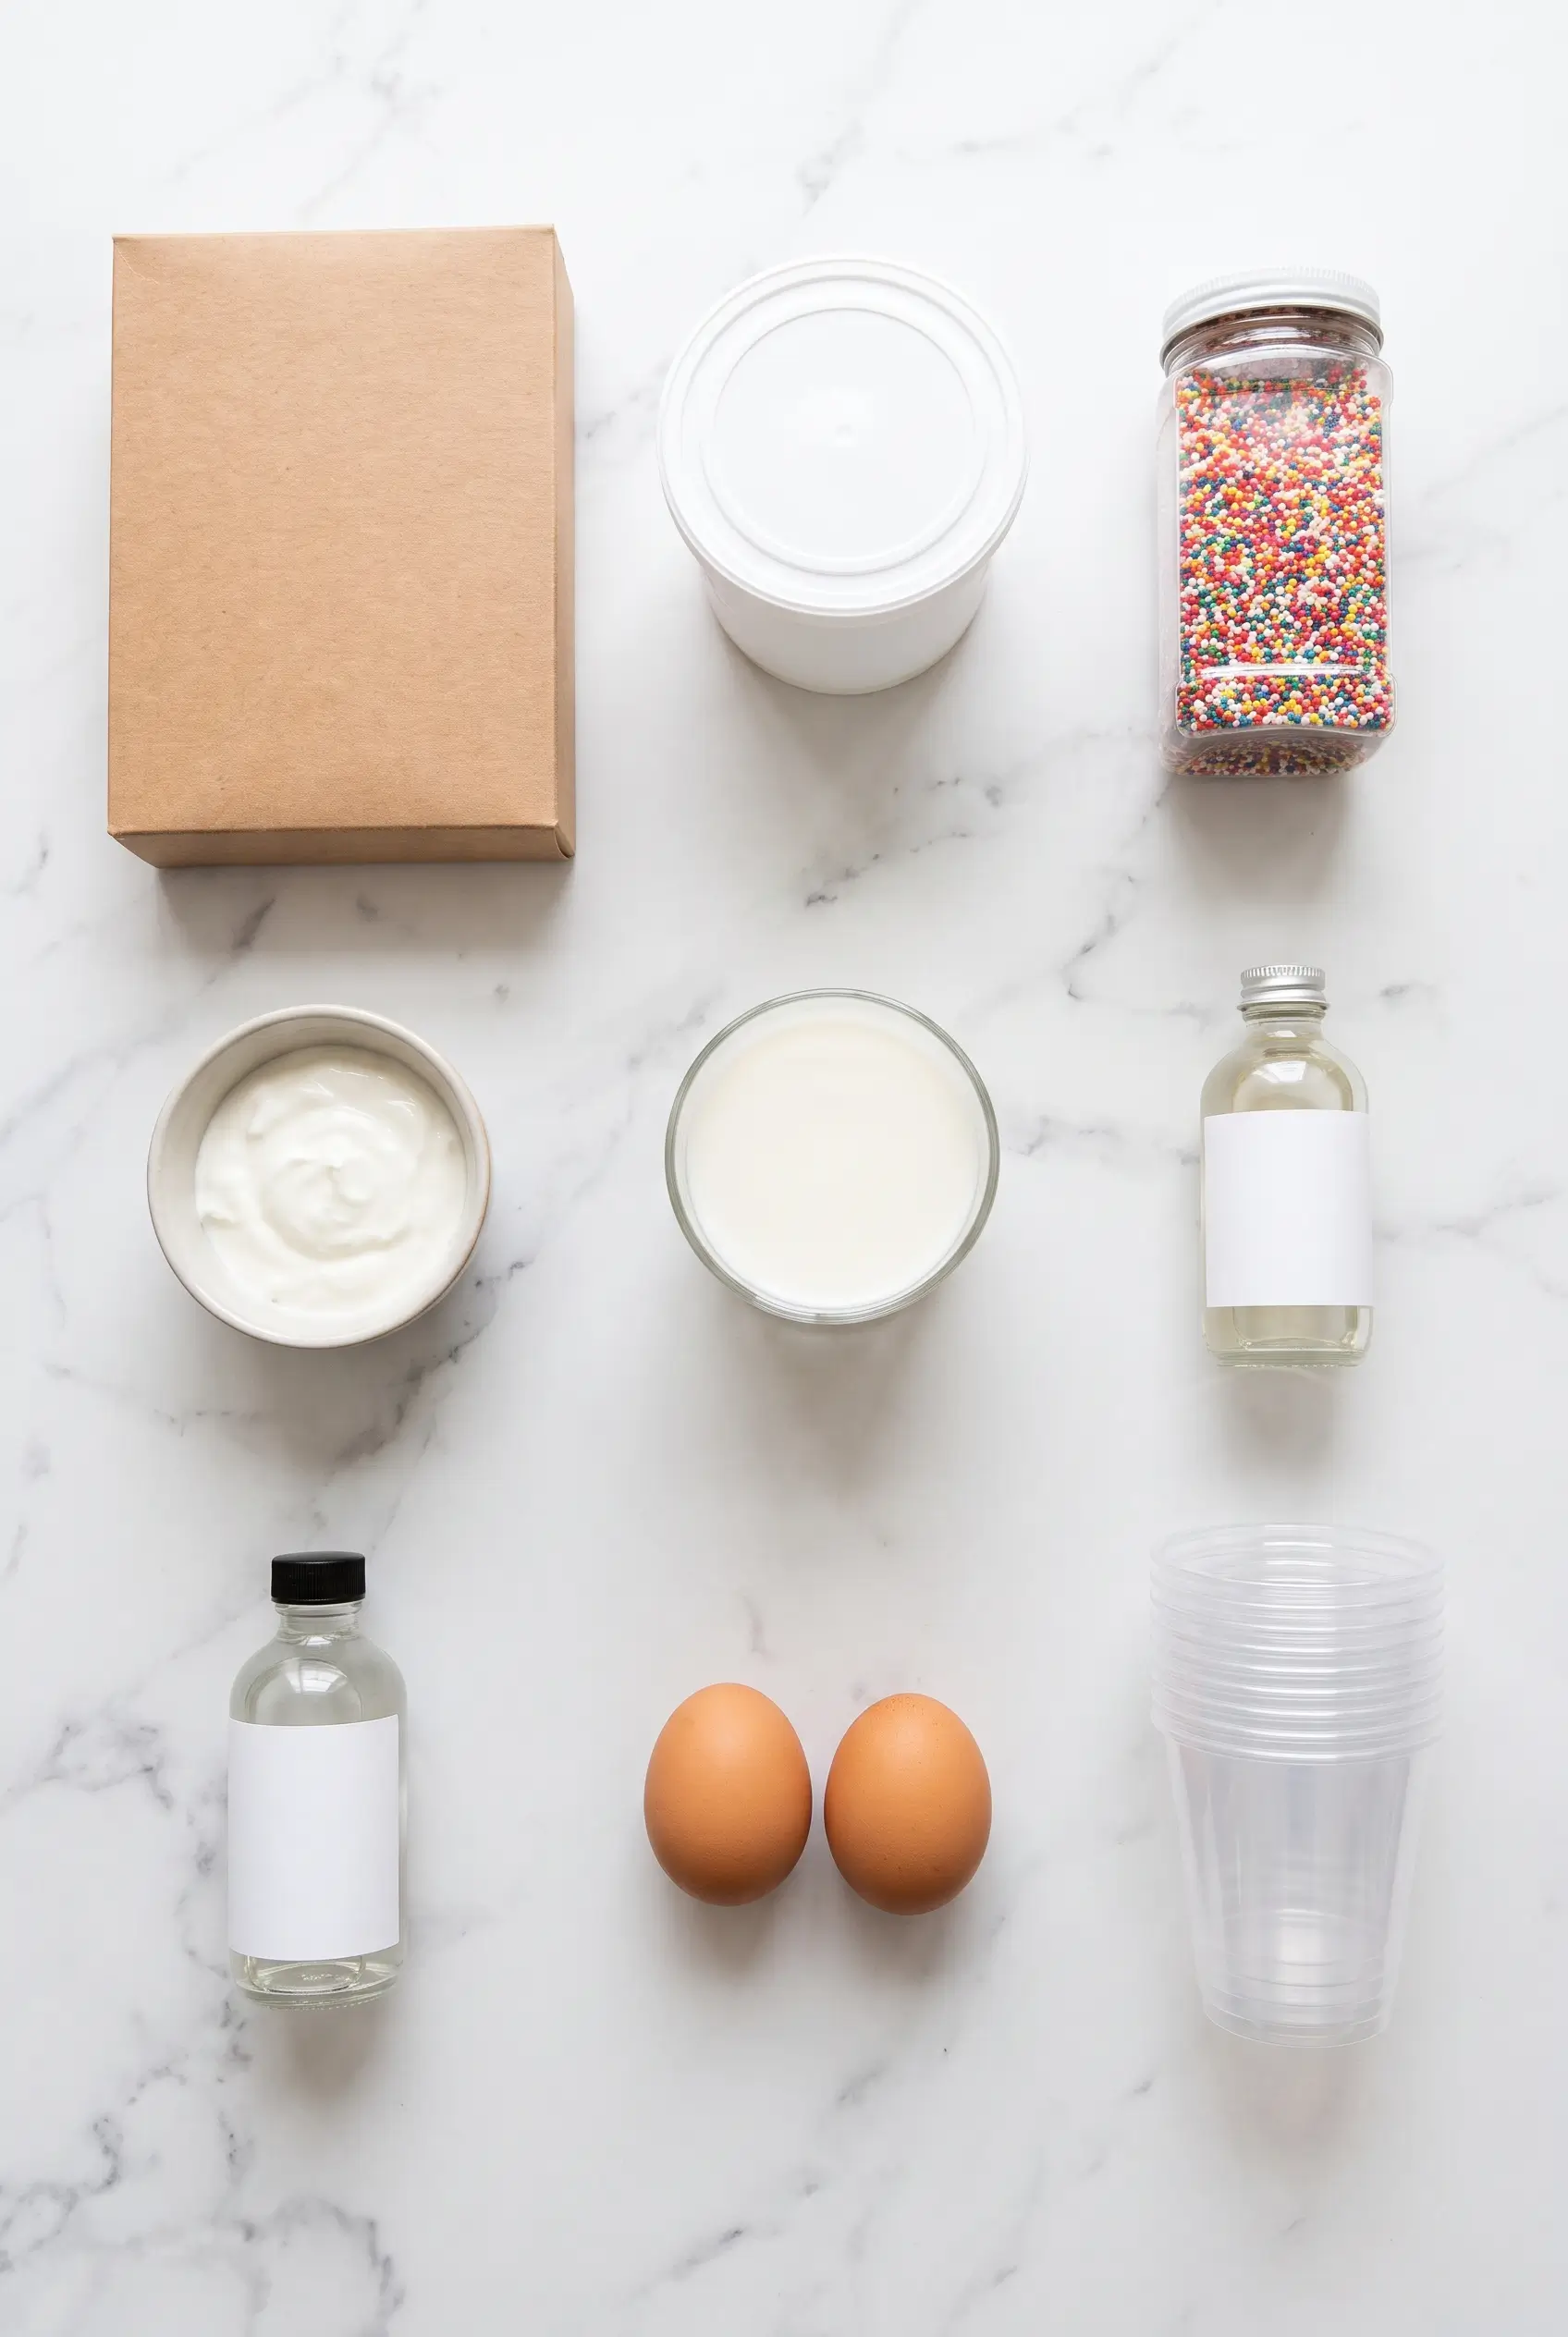
The sprinkles decide everything
Get this wrong and nothing else matters. You need nonpareils — the tiny round beads, sometimes sold as “non pareil sprinkles.” You do not want jimmies, the long rod-shaped ones.
The reason is structural. Nonpareils are minuscule spheres of sugar and starch coated in water-soluble food dye, with no protective wax layer. That is exactly why they pack into a dense, flat, crackable shell — they are small enough to sit shoulder to shoulder with no gaps. Jimmies are wax-finished and rod-shaped: they resist moisture better, but they lie across each other at angles and never form a crust. You get a decorated frosting top, not a shell.
The no-wax part is also why they bleed, which drives two hard rules further down this page.
One bottle of Great Value Rainbow Nonpareils (3.15 oz) runs $2.58 and covers six to eight cups with a little left over — you need about three-quarters of a cup, roughly 130 to 150 g, and each cup takes 20 to 22 g. If you would rather skip synthetic dyes, naturally colored nonpareils made with vegetable and fruit concentrates work the same way mechanically; the colors come out softer and more pastel, and they bleed slightly faster, so build those cups the day you serve them.
Why clear imitation vanilla
This is the bakery-counter secret behind every American copycat recipe that actually tastes like the original, and almost nobody mentions it.
Pure vanilla extract is brown. Stir it into white cake batter and white buttercream and both go a soft amber-ivory. Clear imitation vanilla — built on vanillin rather than extracted bean, and available in alcohol-free formulations — leaves the batter and the frosting optically white. That matters here for two reasons: a pure white frosting makes the rainbow beads read brighter by contrast, and the flavor itself is the one people are chasing. Clear imitation vanilla is the exact note of a supermarket birthday cake from childhood. Real vanilla tastes better in a custard; imitation vanilla tastes like 1996, which is the entire point of this dessert.
The cups
You want 4 to 4.5 oz vessels to match the Costco mini format. Two options:
- Clear PET plastic dessert cups with flat or dome lids — closest to the real thing, stackable, and the dome lids give you clearance over a tall sprinkle crust.
- 4 oz Mason jars — straight-sided rather than conical, which makes the cake-cutting step dramatically easier (more on that below), and reusable.
Whichever you choose, clear is not optional. The visible layers are half of why this dessert works.
Method 1: Boxed Mix, Upgraded
This is the $5.59 version and the one I make most often. The upgrades take about ninety extra seconds and move the result from “obviously a box mix” to “tastes like the store.”
| Component | What to use | Amount | Why |
|---|---|---|---|
| Cake base | White cake mix (Pillsbury Moist Supreme) or yellow cake mix (Duncan Hines) — or one of each, or half vanilla / half Devil’s Food chocolate | 1 standard box (15.25 oz / 432 g) | The nostalgic supermarket-birthday flavor. $1.34–$1.62 |
| Moisture insurance | Full-fat sour cream, room temperature | 2 tbsp (30 g) | Stops the crumb from tightening up in the refrigerator |
| Liquid swap | Whole milk in place of the water the box calls for | As the box specifies (about 1 cup / 240 ml) | Denser, bakery-style crumb instead of a spongy one |
| Fat | Neutral vegetable oil (canola) + eggs or egg whites as the box specifies | About ⅓ cup oil (75 g), 3 egg whites or whole eggs | Oil stays fluid at refrigerator temperature |
| Flavor | Clear imitation vanilla, alcohol-free | 1 tsp (5 ml) | Boosts the vanilla without tinting the batter |
| Frosting | Tub vanilla frosting (Pillsbury Creamy Supreme or similar) + unsalted butter, softened + sifted powdered sugar | 1 × 16 oz tub (453 g) whipped with 4 tbsp (57 g) butter and ½ cup (60 g) powdered sugar | Turns soft tub frosting into a crusting buttercream that sets hard. $1.67–$1.96 |
| Crust | Rainbow nonpareils | ¾–1 cup (130–150 g) | The shell. $2.58 per 3.15 oz bottle |
| Cocoa (optional) | Unsweetened cocoa powder, sifted, + milk | 3 tbsp (25 g) cocoa + 2 tbsp milk | Makes the chocolate half from the same single batch |
Step by step
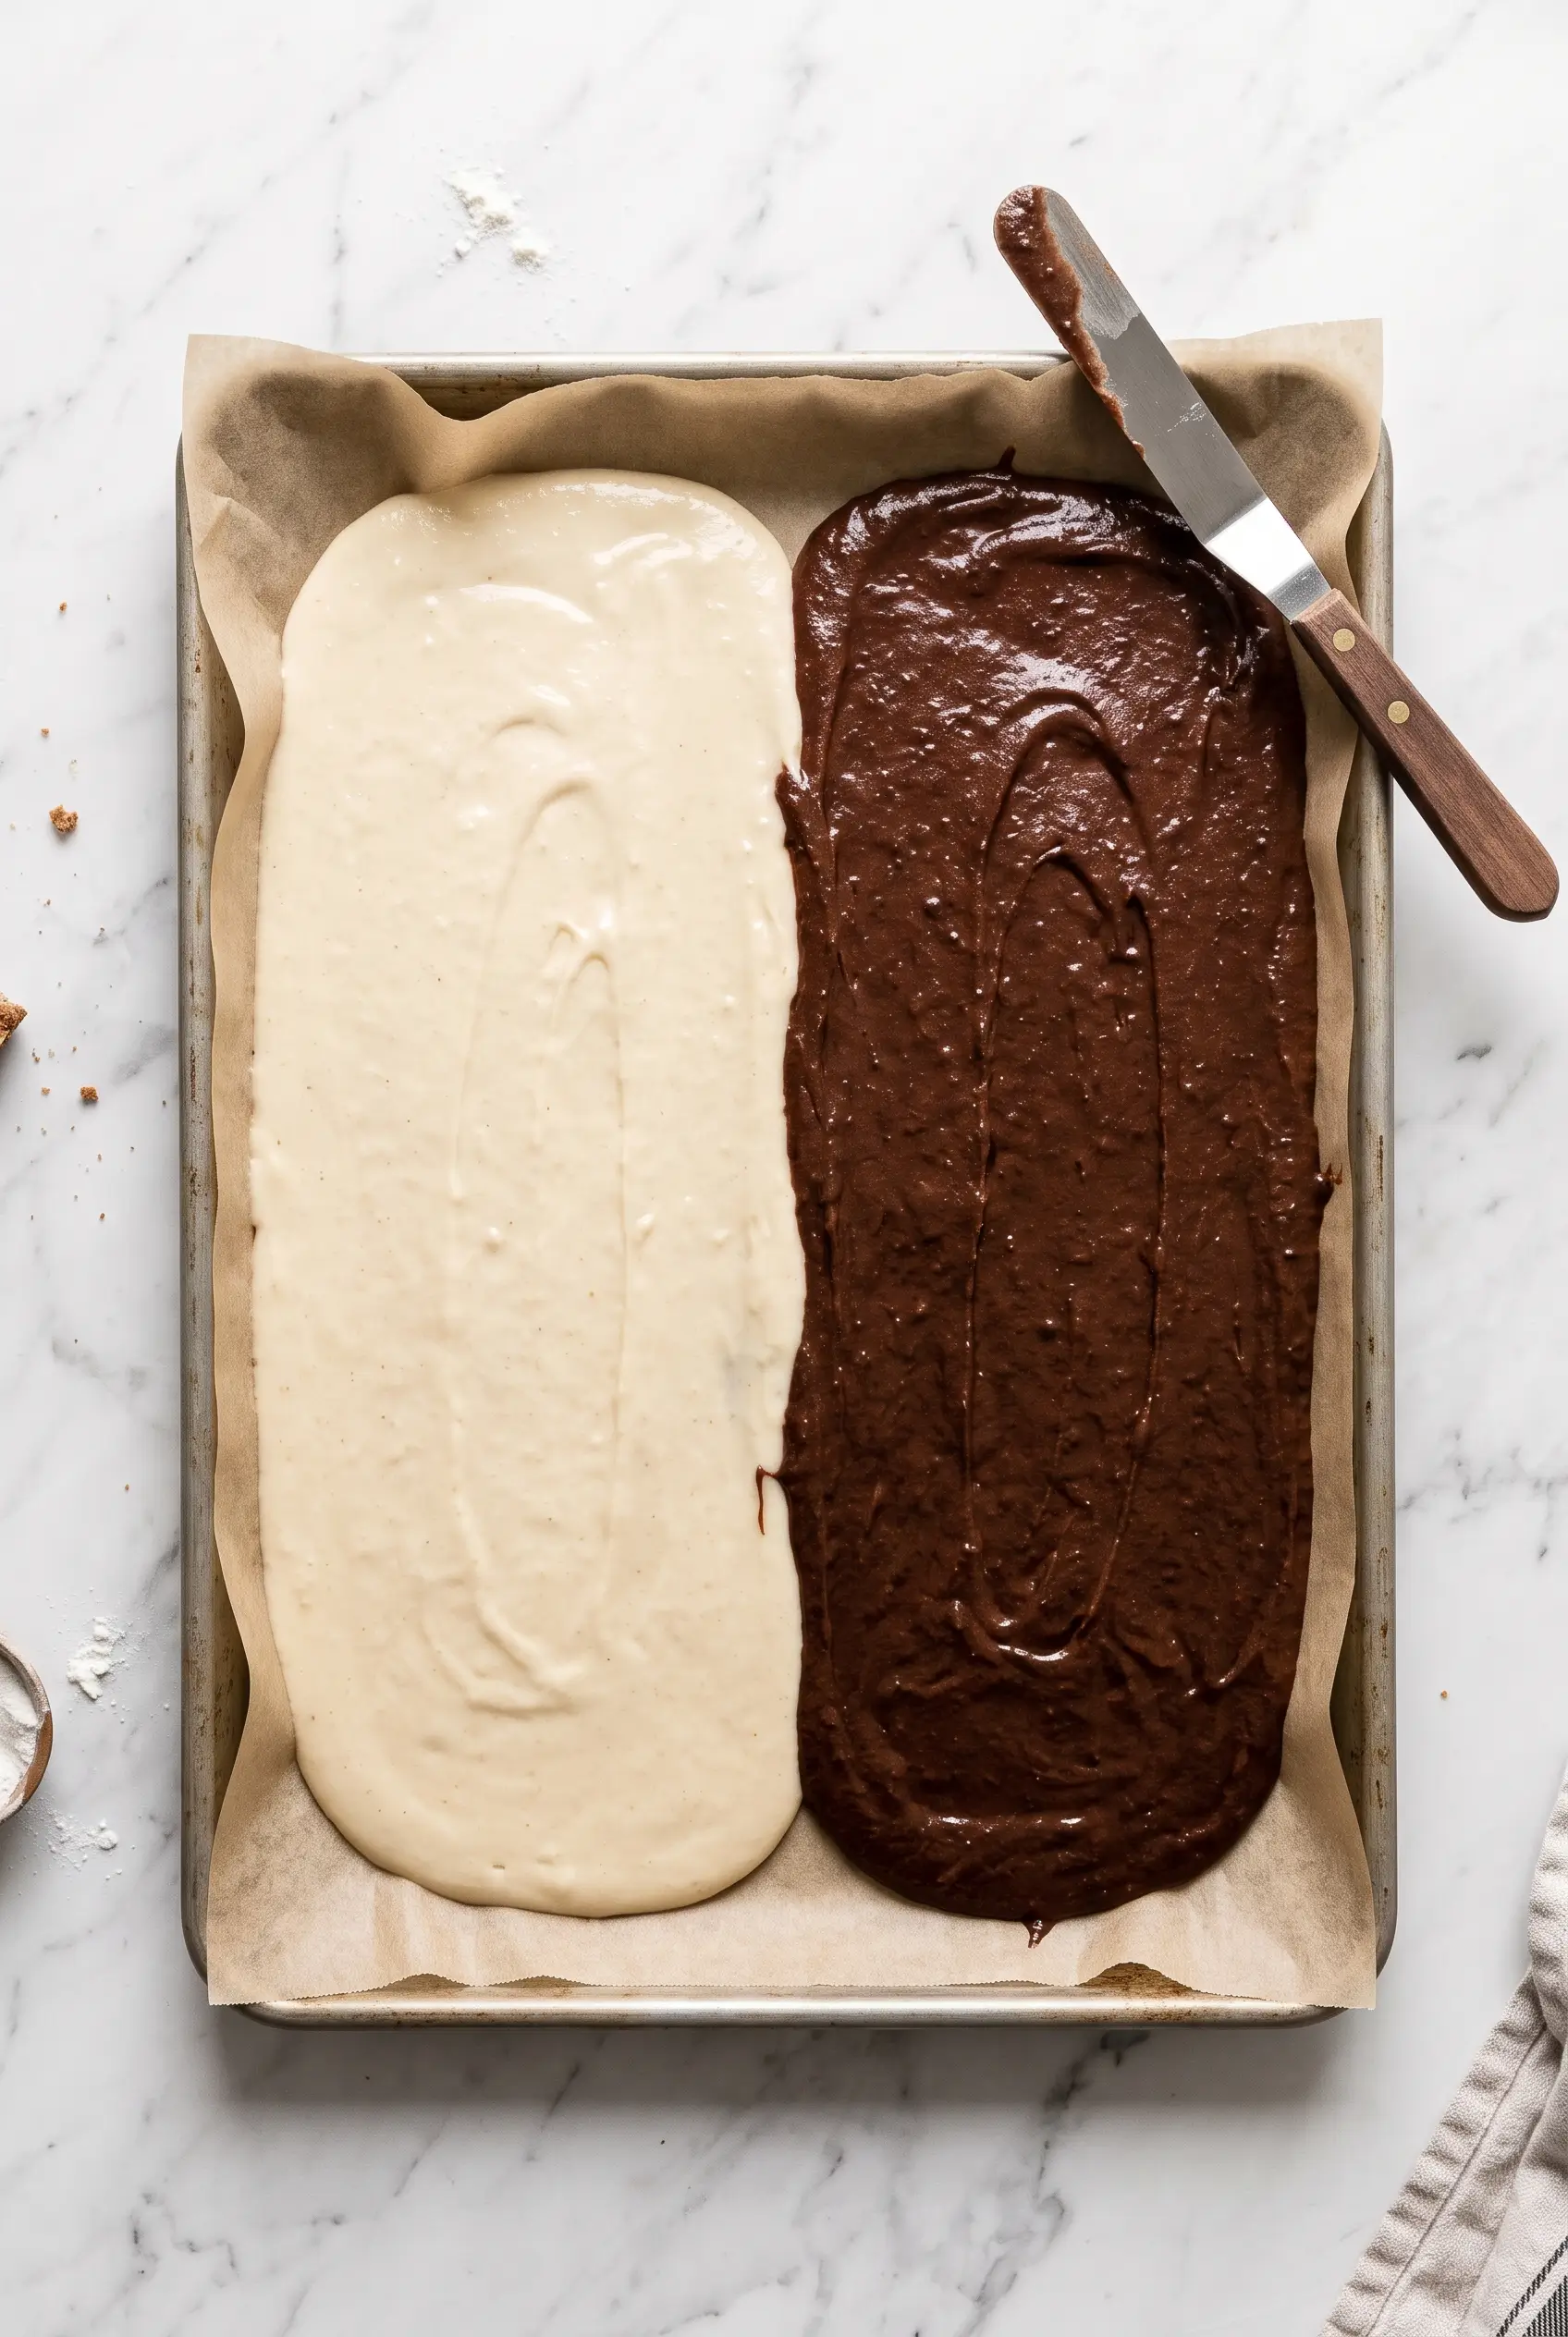
- Heat the oven to 350°F (175°C) and line a 15 × 10 inch (38 × 25 cm) rimmed sheet pan — or a 9 × 13 inch (23 × 33 cm) pan — with parchment. A thin, even sheet of cake is what you want here, not a deep layer.
- Mix the batter in one large bowl: the dry mix, whole milk in place of the water, the oil, the eggs, the 2 tablespoons of sour cream and the teaspoon of clear vanilla. Whisk until smooth.
- Split it for the vanilla–chocolate duo (optional, and the trick that saves you buying a second box): pour half the vanilla batter onto the left side of the pan. Into the remaining half, whisk 3 tablespoons of sifted unsweetened cocoa and 2 tablespoons of milk, then spread that on the right side. You now get three vanilla and three chocolate cups out of one bake, which is exactly the Costco split.
- Bake 18 to 22 minutes. A thin sheet bakes much faster than a deep pan — start checking at 18. Cool completely on a rack. Warm cake tears when you cut discs and melts frosting on contact.
- Upgrade the frosting: beat the 16 oz tub with 4 tablespoons (57 g) softened unsalted butter and ½ cup (60 g) sifted powdered sugar on medium-high for 2 full minutes. This is what makes it crust in the cold. Tub frosting on its own stays tacky and the beads slide.
- Cut, build, dip, chill — the next three sections.
If upgrading a store-bought base is a thing you enjoy, two of my most-used shortcuts work on the same principle: the soft-baked cookie mix hacks and the Marian Designer’s Touch cinnamon roll hack, where a few additions do most of the work.
Method 2: From Scratch
For anyone who would rather not use a mix. This is calibrated to produce exactly six 4.5 oz cups (128 g per serving, about 770 g total), with sour cream added specifically so the cake survives the refrigerator.
White vanilla sponge — for 6 cups
| Ingredient | US volume | Weight | Why it’s there |
|---|---|---|---|
| Cake flour, unbleached (7–8% protein) | 1 cup + ¼ cup | 150 g (5.3 oz) | Low gluten development — tender, airy crumb |
| Granulated white sugar | ⅔ cup + 1 tbsp | 145 g (5.1 oz) | Sweetness and tenderizing |
| Baking powder | 1 tsp + ¼ tsp | 5 g | Even, flat rise |
| Fine kosher salt | ½ tsp | 3 g | Counterweight to the frosting’s sweetness |
| Unsalted butter, melted and slightly cooled | 6 tbsp | 85 g (3.0 oz) | Dairy richness and flavor |
| Canola oil (or grapeseed) | 2 tbsp + 1 tsp | 32 g (1.1 oz) | Stays liquid at 4°C — keeps the cake soft cold |
| Whole milk, room temperature | ½ cup | 120 g (4.2 oz) | Starch hydration |
| Full-fat sour cream, room temperature | 2 tbsp | 30 g (1.0 oz) | Acidity tenderizes gluten and holds free moisture |
| Egg whites, large, room temperature | 2 whites | 65 g (2.3 oz) | Structure with no yellow tint from the yolk |
| Clear imitation vanilla, alcohol-free | 1 tbsp | 15 ml | Optical white crumb, authentic flavor |
Chocolate variation (for the duo pack)
Replace 30 g of the cake flour with 30 g Dutch-processed unsweetened cocoa (⅓ cup) — so 120 g flour + 30 g cocoa. Swap the two egg whites for 1 whole egg (50 g) and add 15 g hot water. Deep color, fudgier crumb, same cup count.
Crusting American buttercream
| Ingredient | US volume | Weight | Why it’s there |
|---|---|---|---|
| Unsalted butter at 19–20°C (soft but not greasy) | ¾ cup (1½ sticks) | 170 g (6.0 oz) | The fat that hardens in the cold and locks the beads |
| Powdered sugar, sifted | 2 cups + ½ cup | 285 g (10.0 oz) | High sugar-to-butter ratio is what forms the crust |
| Heavy cream or whole milk | 2 tbsp | 30 ml (1.0 oz) | Emulsion and smoothness |
| Clear imitation vanilla + kosher salt | 1 tsp + ¼ tsp | 5 ml + 1.5 g | Pure white frosting, less cloying |
| Rainbow nonpareils | ¾ cup | 135 g (4.75 oz) | About 22 g adheres per cup |
Step by step
- Heat the oven to 350°F (175°C) and line a 9 × 13 inch pan with parchment — or two 8 × 8 inch pans if you are splitting the batter for three vanilla and three chocolate cups.
- Melt the 85 g of butter directly in your main mixing bowl and let it cool a few minutes. This is the one-bowl shortcut that saves washing up.
- Into that same bowl add the canola oil (32 g), whole milk (120 g), sour cream (30 g), the two room-temperature egg whites (65 g) and the tablespoon of clear vanilla (15 ml). Whisk hard until it emulsifies.
- In a second bowl, sift and whisk together the cake flour (150 g), sugar (145 g), baking powder (5 g) and kosher salt (3 g).
- Fold the dry into the wet with a silicone spatula until the batter is smooth and loose. It should look deliberately like a box-mix batter — thin and pourable. Do not keep stirring once it comes together; that activates gluten and you lose the tender crumb.
- Pour the roughly 635 g of batter into the pan, level the surface, and bake 18 to 20 minutes, until the center springs back under a finger. Cool completely.
- Make the buttercream: beat the 170 g of softened butter with the paddle attachment on medium-high for 2 minutes until it pales. Drop to the lowest speed and add the 285 g of sifted powdered sugar gradually. Pour in the 30 ml of cream, the 5 ml of clear vanilla and the salt. Then raise to maximum and whip a full 3 minutes — that is what gives you a very white, aerated, stable frosting.
If you have ever worked with a frosting that refuses to hold its shape, the same stabilizing logic applies here as in my stabilized whipped cream without gelatin — it is all about getting the fat structure right before the cold does the rest.
How to Cut the Rounds
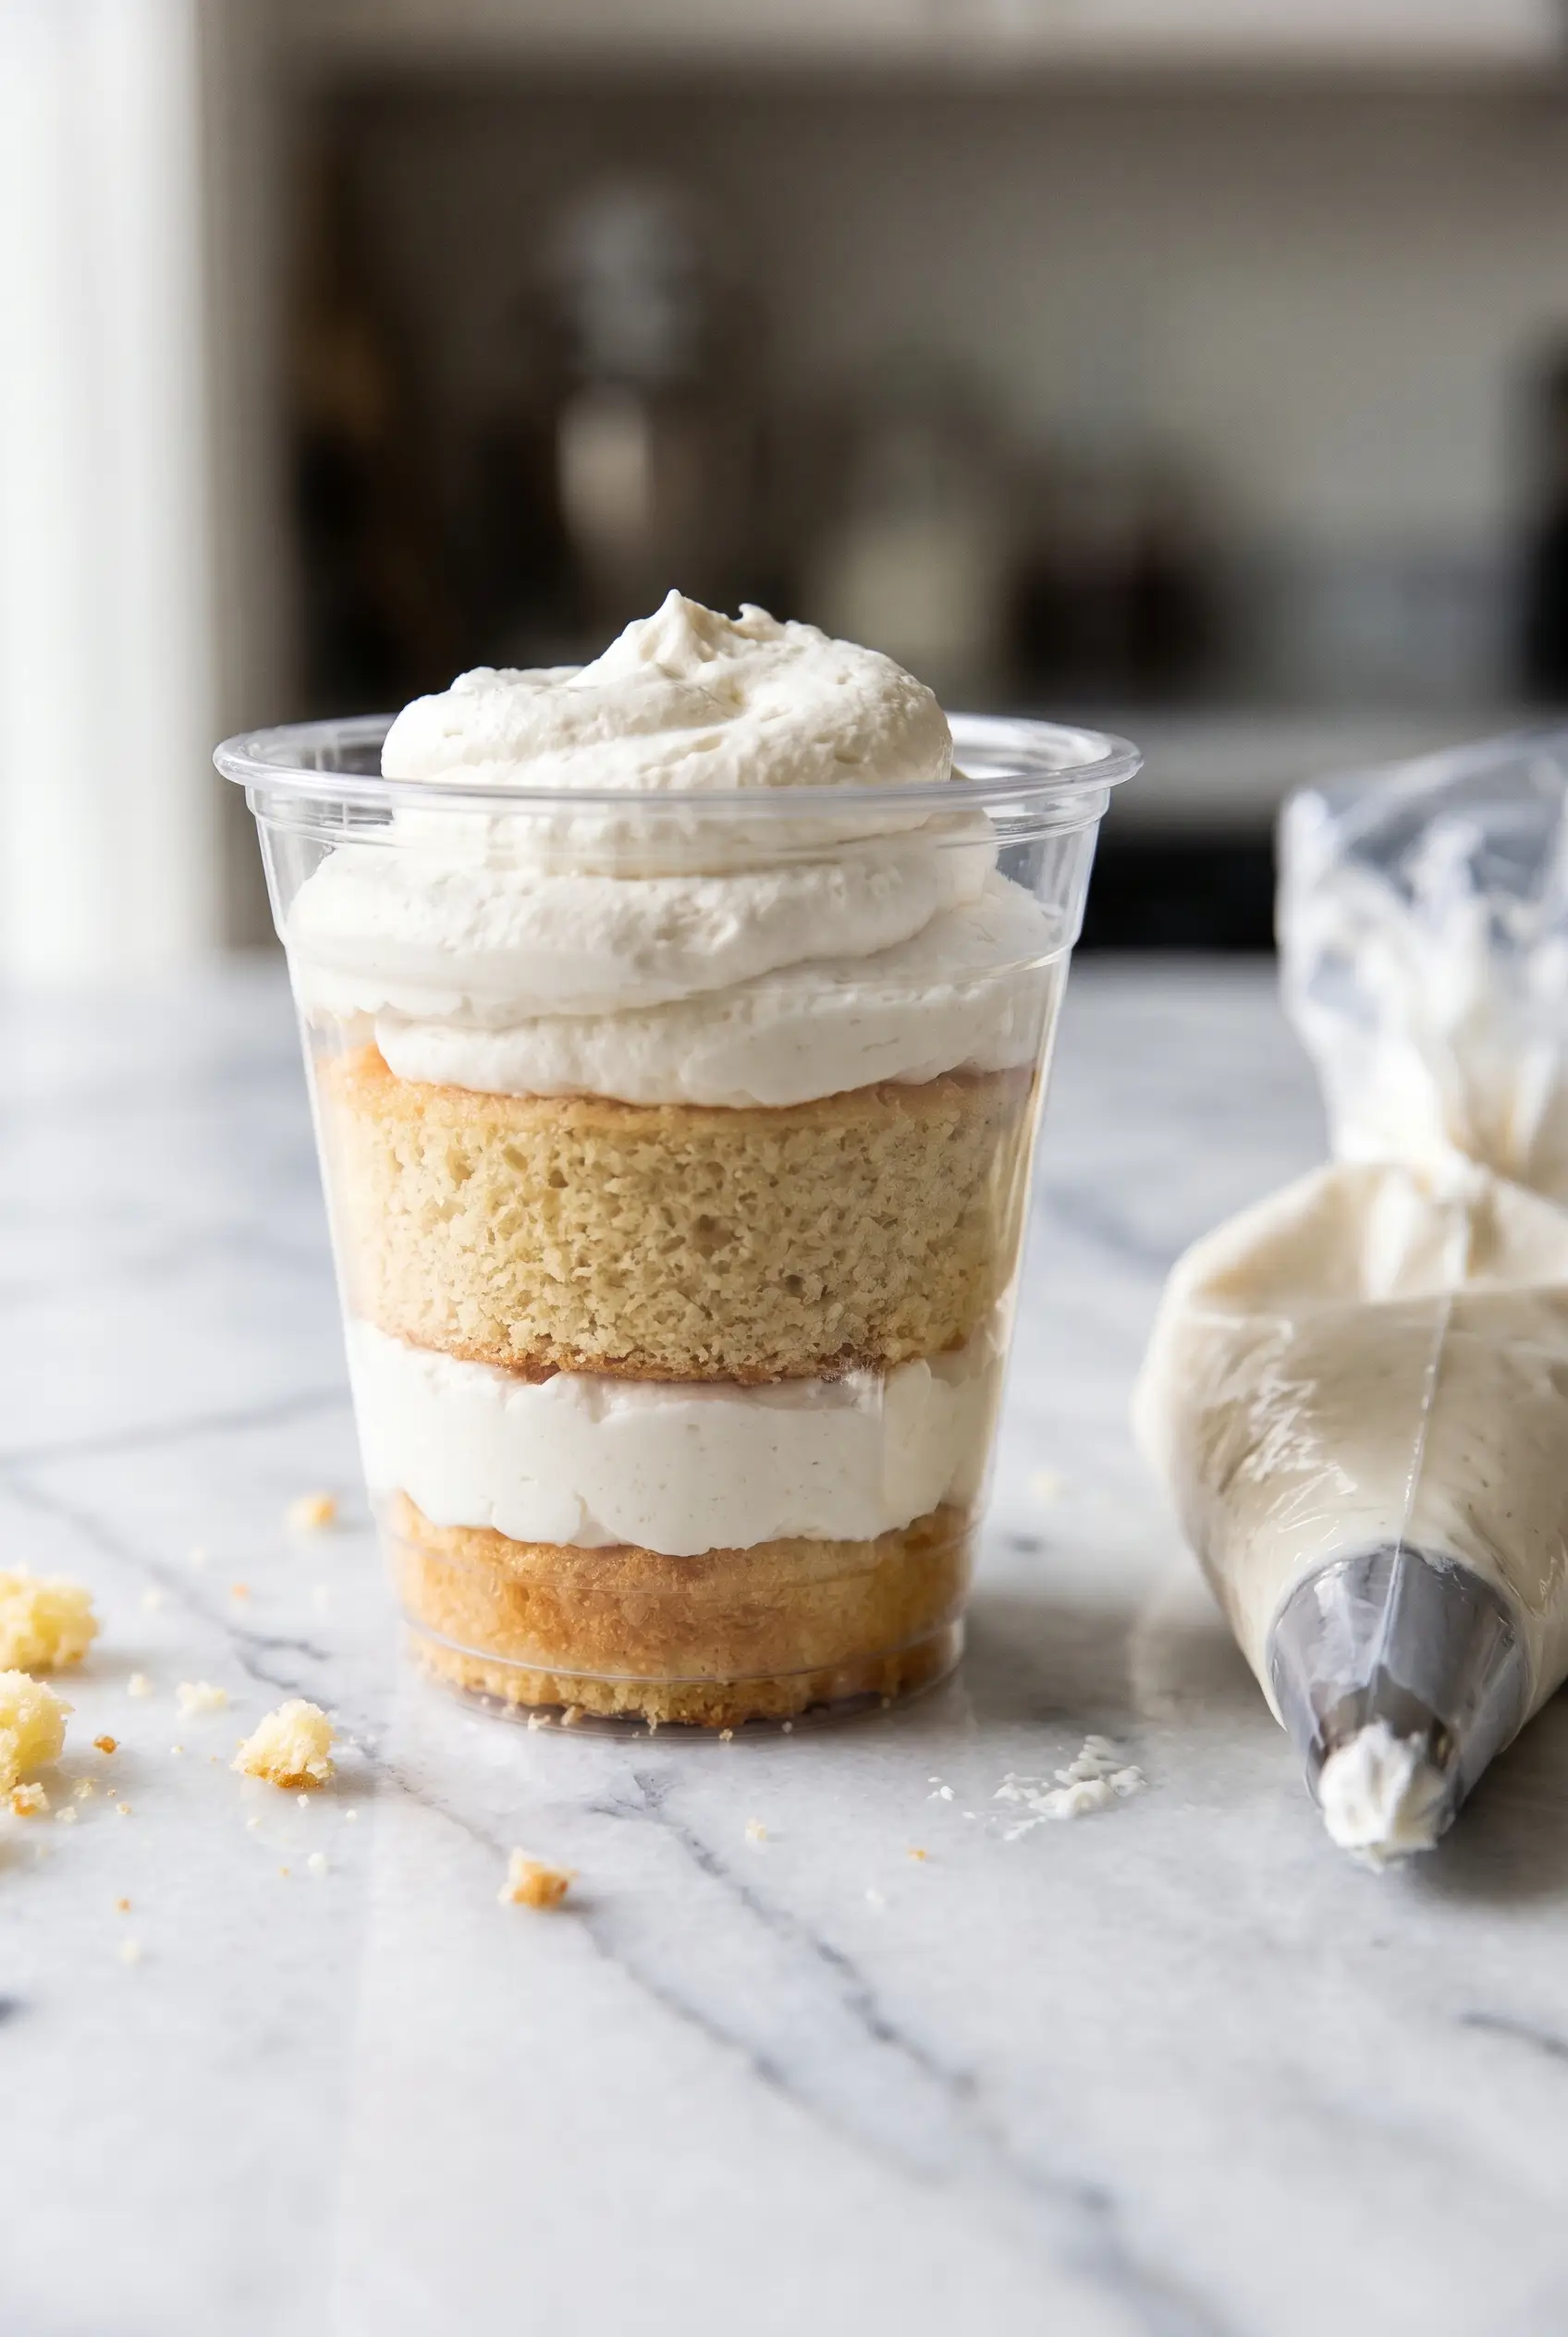
This is where most homemade versions go wrong, and the fix takes thirty seconds to understand.
Most clear plastic dessert cups are conical — narrower at the base than at the rim. If you cut every disc to one diameter, the discs that fit the bottom leave a visible ring of empty space against the walls higher up, and the discs that fit the rim will not go down into the cup at all.
So use two round cutters of slightly different sizes:
- 6 to 8 large discs at about 7 cm (2.75 inches) — these sit in the upper part of the cup
- 6 to 8 small discs at about 5.5 cm (2.25 inches) — these go in the bottom
Cut the large discs first across the sheet, then use the gaps between them for the small ones. You will have scraps; keep them (see below).
If you are using straight-sided 4 oz Mason jars, forget all of that: turn the empty jar upside down and press its mouth straight into the sheet of cake like a cookie cutter. The disc stays lodged in the rim, and you push it down into the jar with your thumb. One cutter, no geometry, perfect fit.
The Frosting That Locks the Sprinkles In
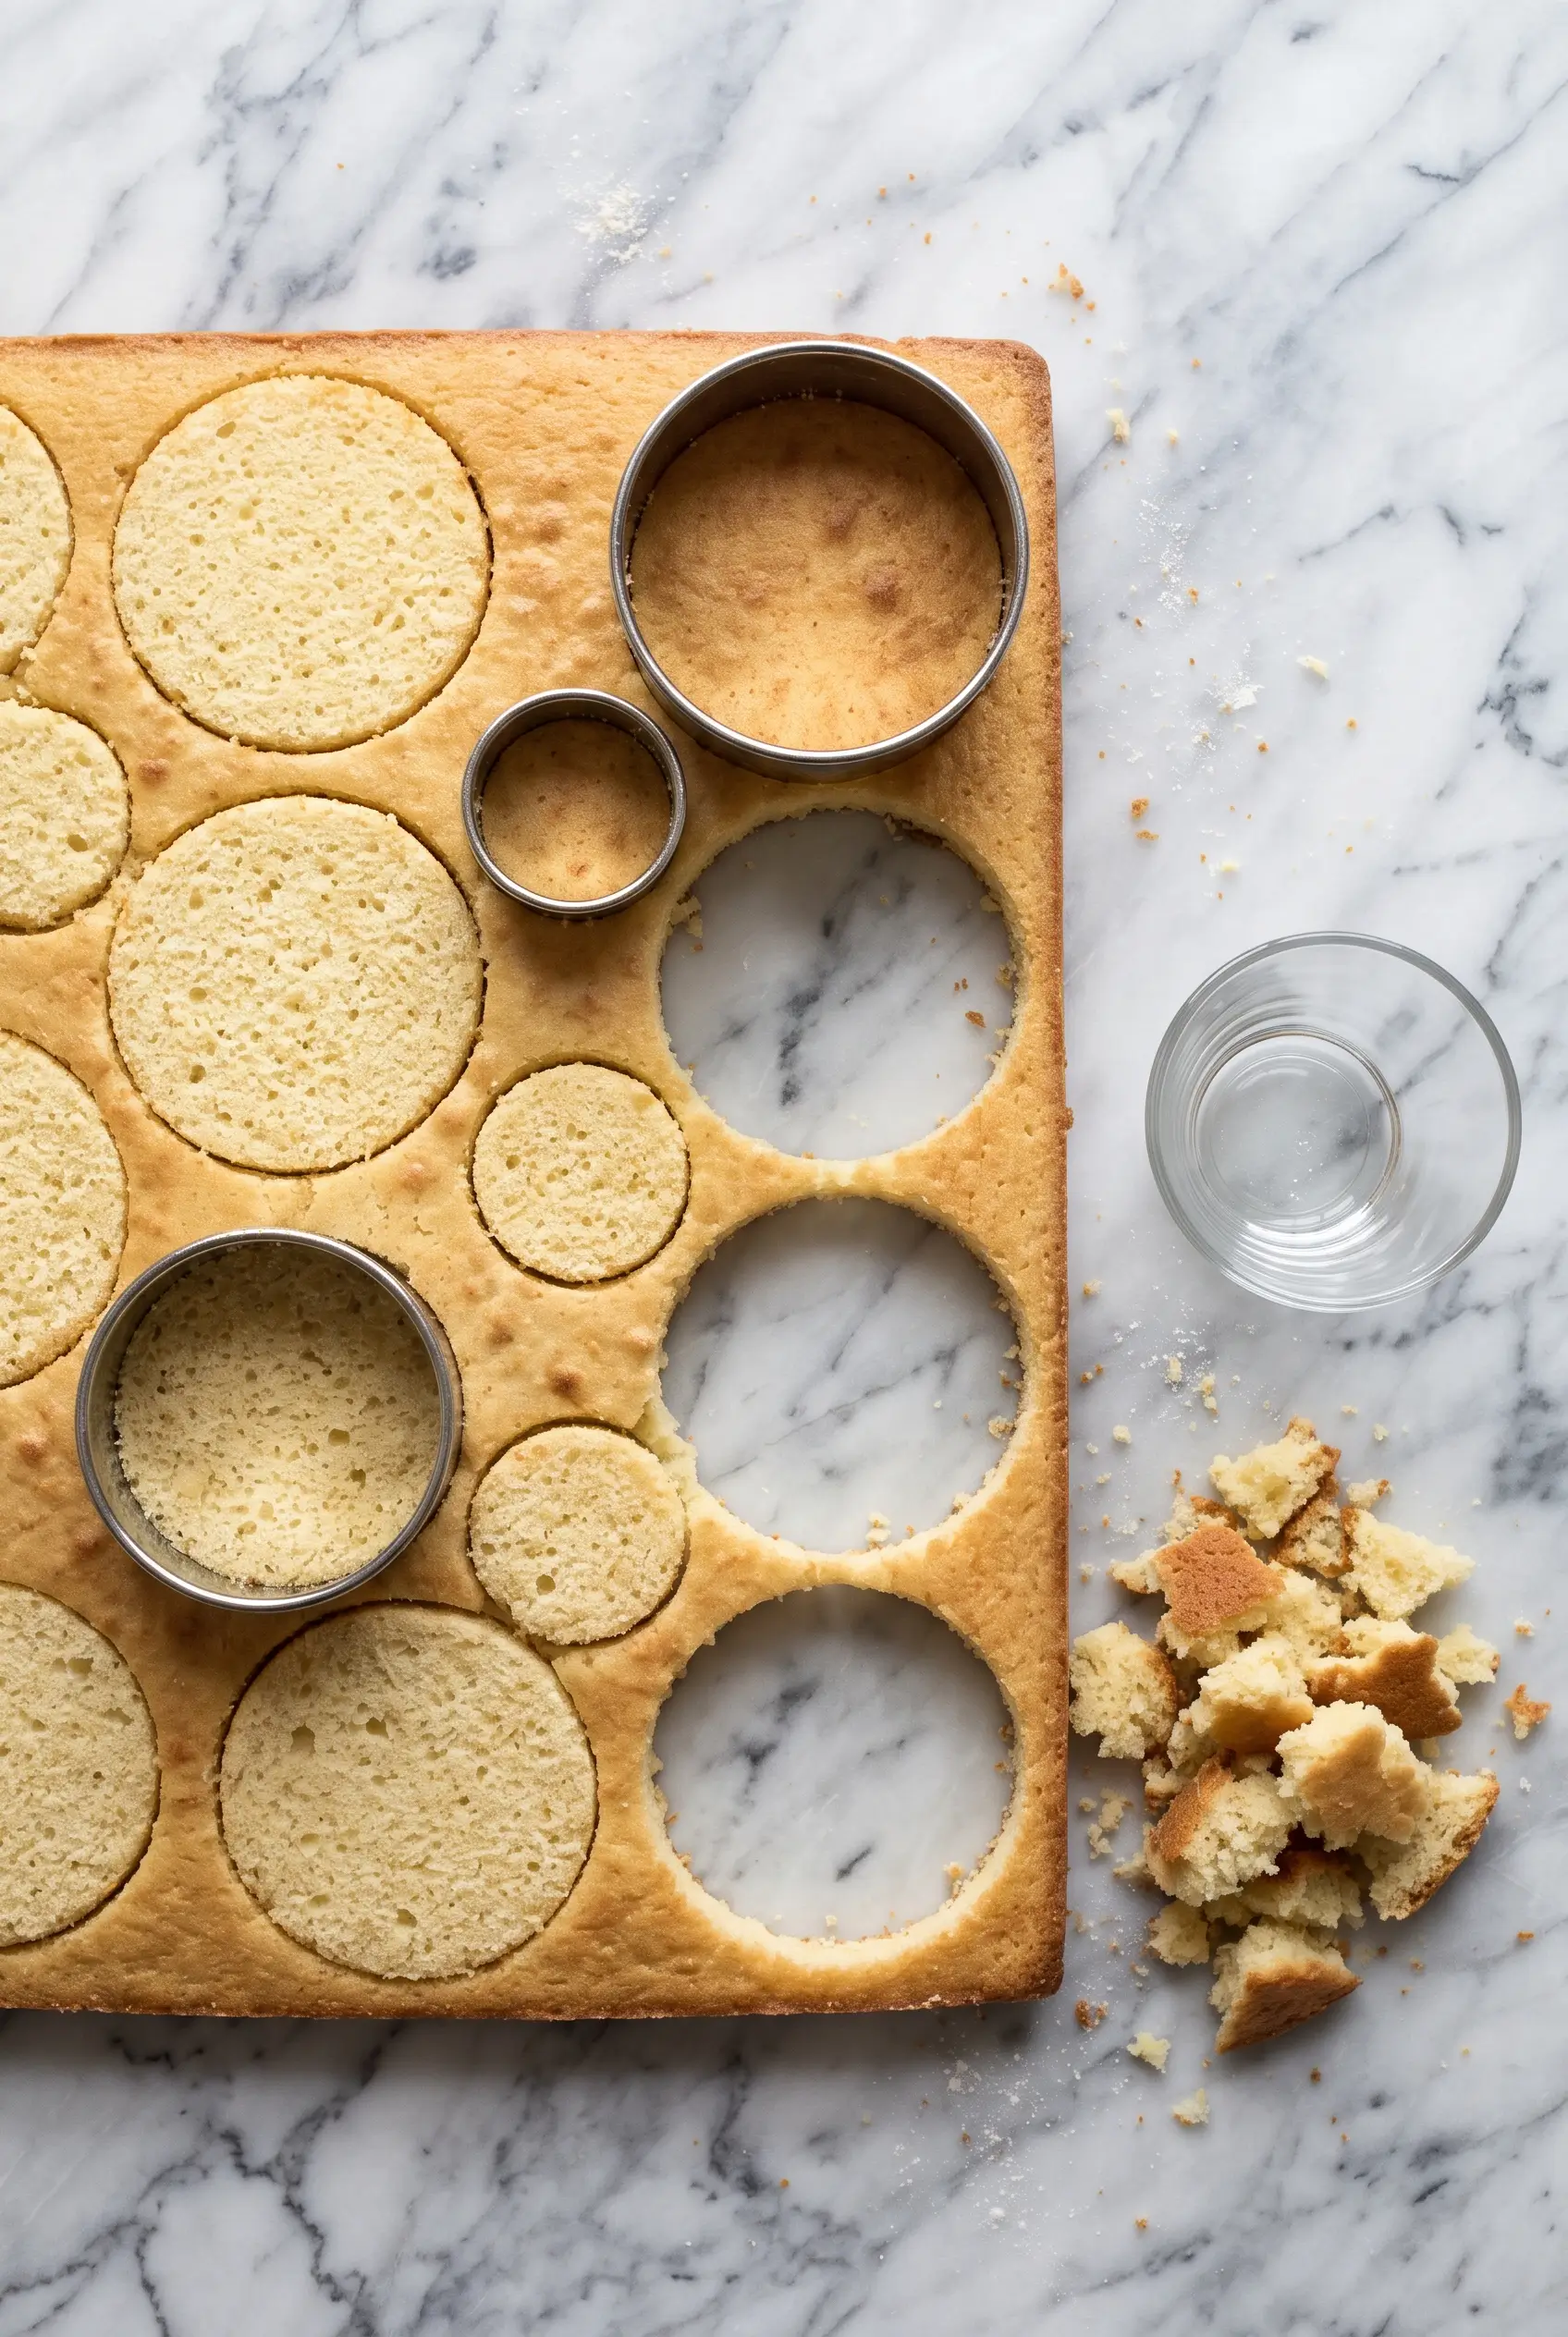
Whether you whipped a tub or made buttercream from scratch, the assembly is the same, and the proportions matter more than they look:
- Drop a small disc of cake into the bottom of each cup.
- Spread or pipe a middle layer of frosting — about 1 tablespoon (15 g).
- Press the larger disc on top of it.
- Top with a thick layer of frosting, roughly 1.5 to 2 cm (30 g), stopping about 3 mm below the rim of the cup. Do not bother smoothing it — it is about to be covered completely.
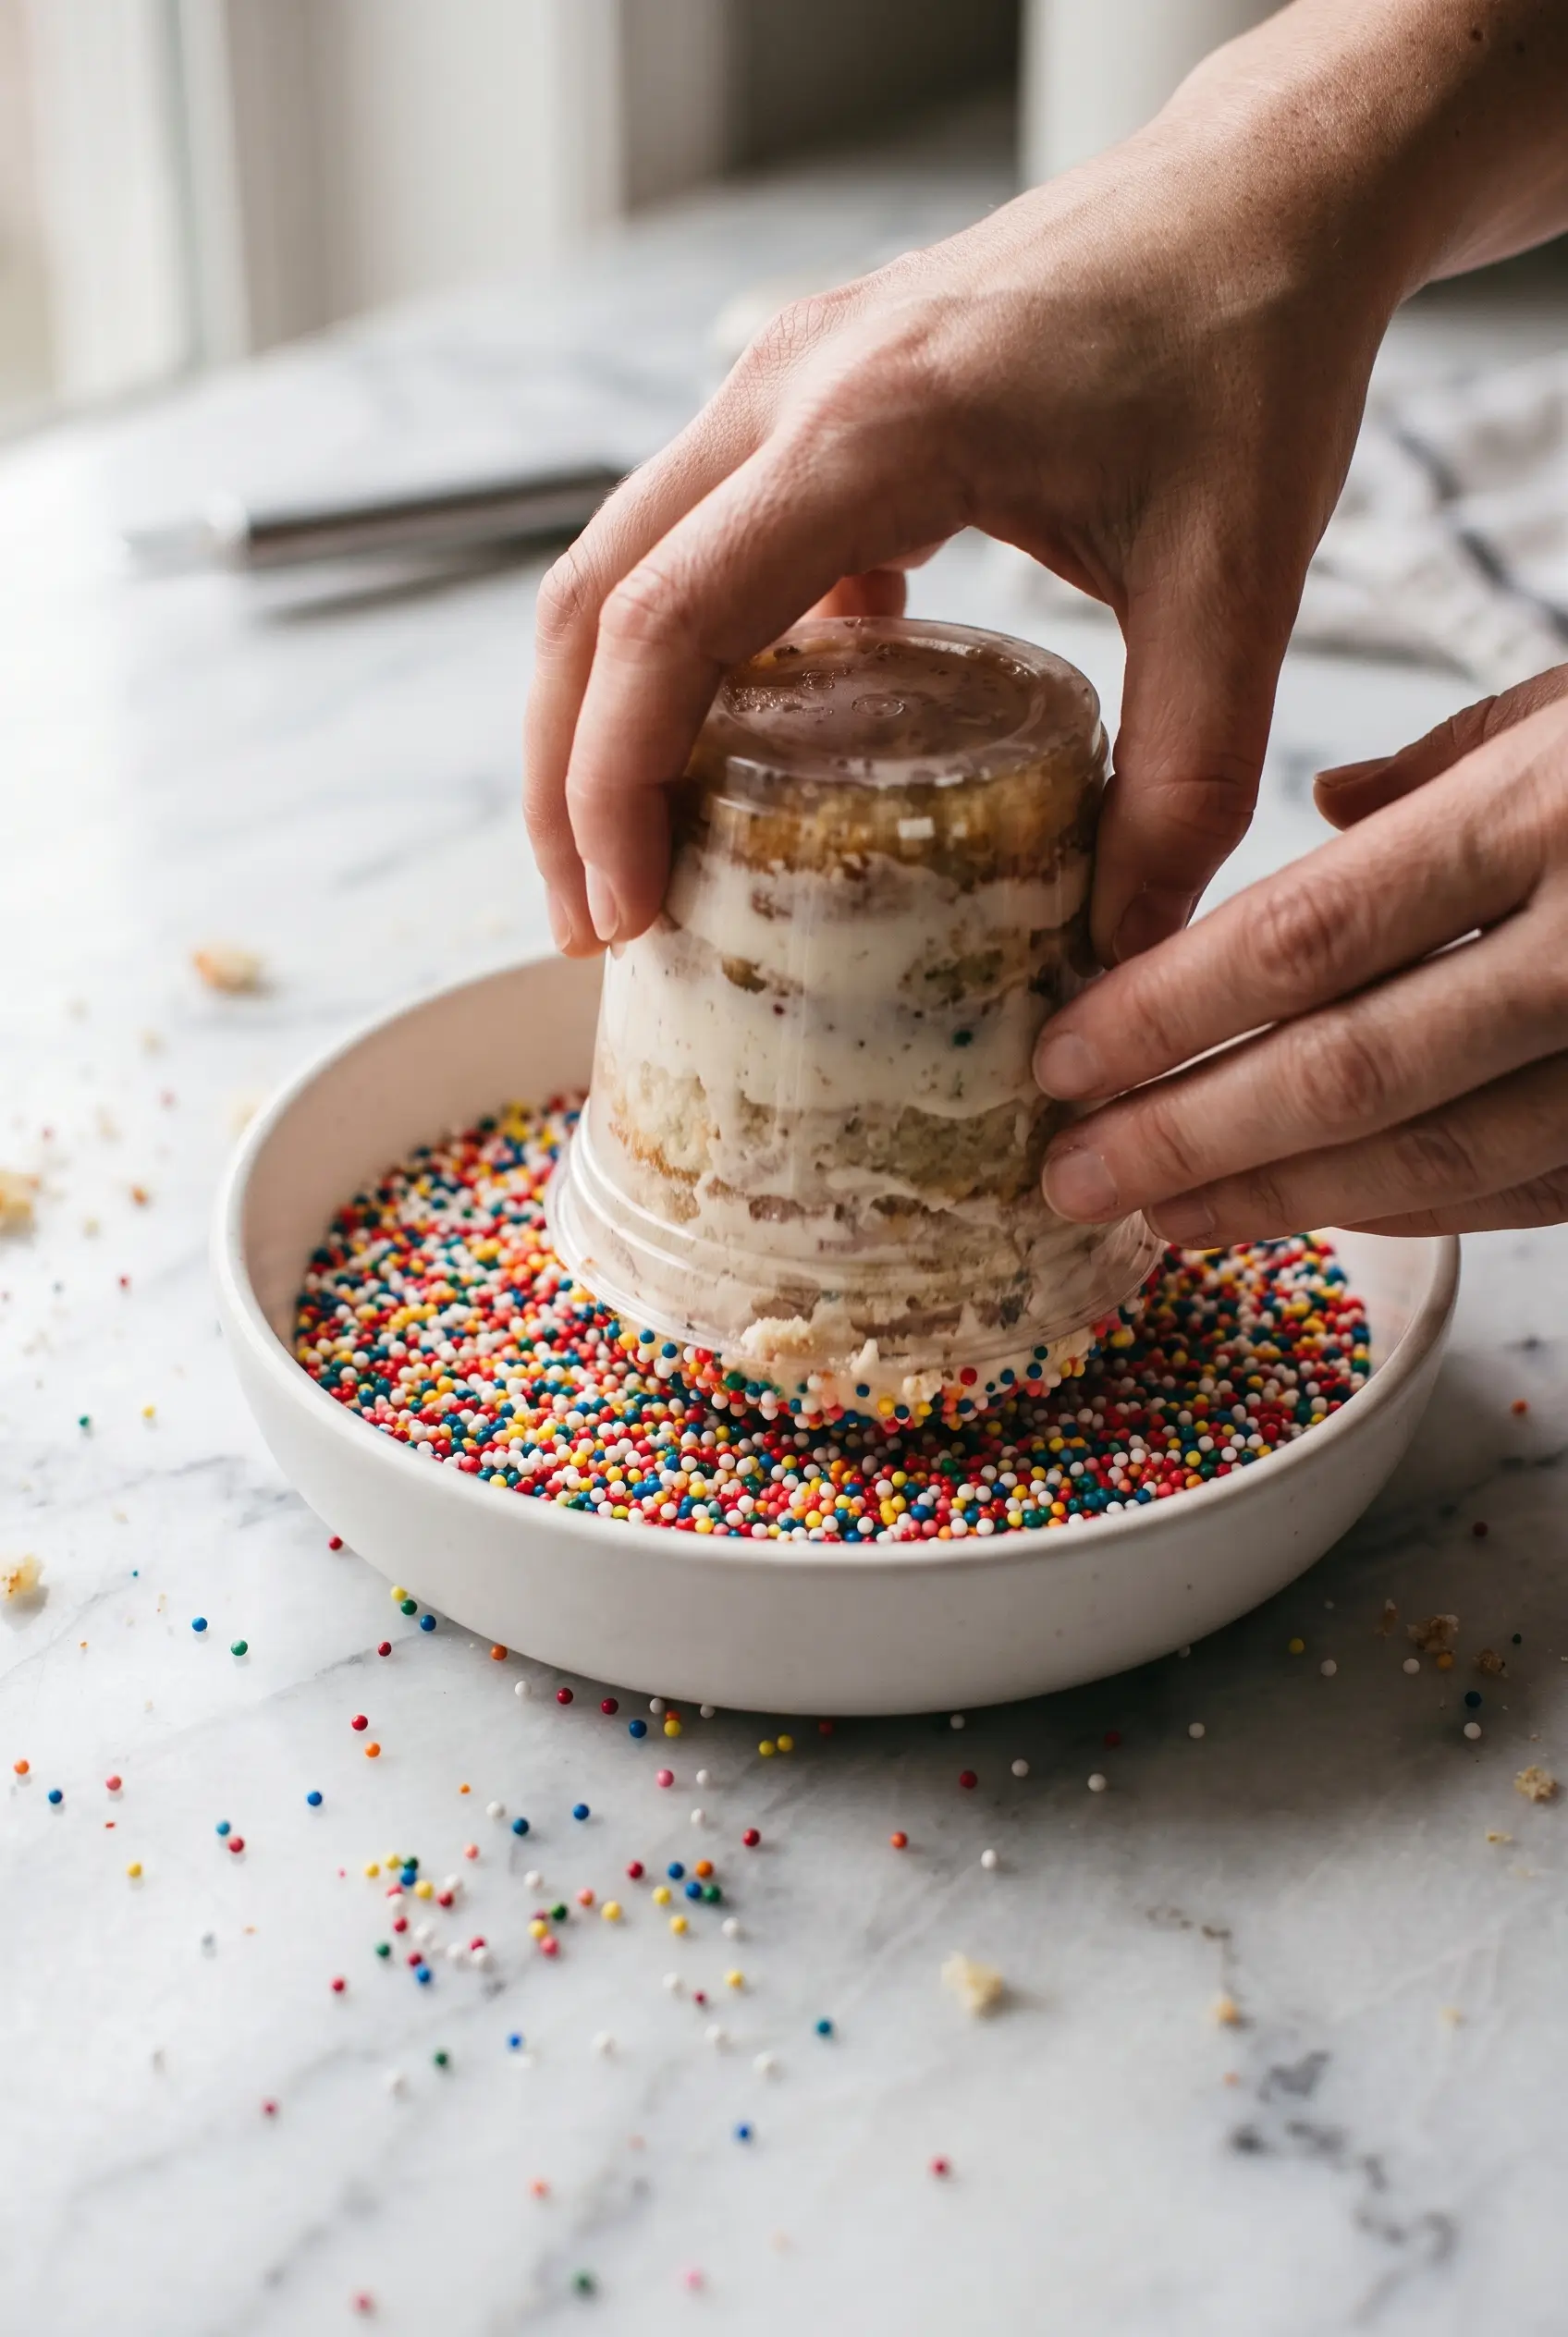
- Pour the nonpareils into a shallow bowl or deep plate. Turn each cup upside down and press the frosting dome firmly into the bed of beads, with a small twisting motion to saturate the whole visible surface.
Per cup that works out to roughly 70 to 75 g of cake in two tiers, 15 g of frosting in the middle, 30 g on top and 20 to 22 g of sprinkles on the shell.
The 2-Hour Chill Nobody Mentions
This is the step that makes it a dot cake instead of a cupcake in a cup. Put the lids on and refrigerate the assembled cups for at least 2 hours before serving. During that time the butter in the frosting sets hard and welds the loose beads into a single crackable shell. That is what produces the sound. Serve them at room temperature straight after assembly and the sprinkles will shift under the spoon as a loose layer — right flavor, none of the effect.
This is also why the fat composition in both recipes matters. Buttercream made with butter alone firms up below about 18°C, and a cake made with butter alone tastes dry and compact coming out of the cold. The oil stays fluid at refrigerator temperature and the full-fat sour cream holds onto free moisture, so the cake under that hard crust is still soft. You need the frosting to go rigid and the cake to stay tender, in the same cup, at the same temperature — which is a real engineering problem, and that is the solution.
Once chilled, take the cup out 10 to 15 minutes before eating. Cold enough that the shell cracks, warm enough that the cake tastes like cake.
Mistakes to Avoid
Never stir nonpareils into the batter
They will melt. Nonpareils have no wax coating, so the moment they hit wet batter the dye dissolves, and twenty minutes in the oven turns your white cake a uniform grey-brown. It looks like a mistake because it is one.
If you want a confetti interior, use jimmies instead — the long waxed ones hold their shape through baking, which is exactly why funfetti cake uses them. Nonpareils go on the outside, after chilling, and nowhere else.
Never freeze an assembled dot cake
Several recipe sites suggest freezing the finished cups, or keeping them refrigerated for three weeks. Both are wrong, and the second one is not even about safety — it is about appearance.
When a frosted, sprinkled cup thaws, condensation forms on the surface of the beads. The dye on nonpareils is water-soluble and unprotected, so it dissolves on contact and runs: within 48 to 96 hours you get multicolored streaks bleeding down into white buttercream, and the crust has gone soft and sandy. There is no fixing it once it starts.
Freeze the bare sponge only, wrapped individually, up to 2 months. Thaw at room temperature and assemble with fresh frosting and sprinkles the day before you need them.
Storage and Make-Ahead
- Refrigerated, lidded: 2 to 4 days at best quality, 5 days maximum — that is the limit the Roslyn bakery gives for its own cups, and it is the number I would hold to.
- Room temperature: no more than 48 hours before the beads begin softening and the crust loses its snap.
- Freezer: bare baked sheet or bare cut discs only, well wrapped, up to 2 months.
- Best make-ahead plan: bake and freeze the discs whenever it suits you, then assemble with fresh frosting the day before the event. You get the texture of a same-day cup with none of the same-day work.
Variations
- Chocolate — the cocoa swap above, or half the sheet from one batch.
- Funfetti — jimmies folded into the batter (never nonpareils), nonpareil shell on top.
- Lemon-mascarpone — lemon zest in the sponge, mascarpone folded into the buttercream at a 1:4 ratio. It cuts the sweetness that most people complain about in the store version, and it still crusts.
- Holiday colors — same base, different shell. I broke the three best ones into their own guide, because red and green nonpareils behave differently from rainbow and need a tighter assembly window: Christmas versions.
For another dessert that leans on a single bold color instead of sprinkles, my ube crinkle cookies use the same trick of letting one visual element carry the whole thing.
What to Do With the Cake Scraps
Cutting discs out of a sheet leaves about a third of the cake behind, and throwing that away feels terrible. Do not.
Freeze the scraps in a bag, then crumble them straight into a homemade ice cream base — vanilla, churned, with cake crumbs folded in during the last minute. That is birthday cake ice cream, and it is better than the version sold in pints because your crumbs are actual cake rather than extruded cake-flavored pieces. The scraps keep two months frozen, so you can collect them across a couple of batches before you churn.
You can also layer the crumbs into a parfait with whipped cream and more sprinkles, which takes five minutes and uses up everything.
FAQ
How do you make dot cakes without the sprinkles falling off?
Two things: add butter and powdered sugar to tub frosting so it crusts instead of staying tacky, and refrigerate the assembled cups at least 2 hours. The chilled butter sets hard and grips the beads mechanically. A properly chilled cup can be turned completely upside down without losing a single sprinkle.
What kind of sprinkles do you use for dot cakes?
Nonpareils — the tiny round beads. They pack into a dense crackable shell. Long jimmies will not form a crust because they sit at angles against each other. Save the jimmies for mixing into batter, which nonpareils must never be used for.
How much does it cost to make dot cakes at home?
About $5.59 for six to eight cups using a boxed mix, tub frosting and one bottle of nonpareils — roughly 78 to 93 cents a cup, against $2.48 at Costco and $11.00 in Manhattan.
Can I make dot cakes ahead of time?
Yes. Bake and freeze the bare cake discs up to 2 months ahead, then assemble with fresh frosting and sprinkles the day before serving. Do not freeze assembled cups — thawing makes the sprinkle dye bleed into the frosting within 48 to 96 hours.
Why is my dot cake dry after refrigerating?
Almost always because the recipe used butter as the only fat. Butter firms below about 18°C and the crumb goes tight. Use both melted butter and a neutral oil, plus 2 tablespoons of full-fat sour cream — the oil stays fluid when cold and the sour cream holds moisture.
Do I need clear vanilla to make dot cakes?
Not strictly, but it changes the result. Pure vanilla extract tints the batter and the frosting ivory; clear imitation vanilla keeps both optically white, which makes the colored beads read brighter, and its flavor is the nostalgic supermarket-birthday note this dessert is built on.
What size cups do you need for dot cakes?
4 to 4.5 oz clear cups, matching the mini format. Straight-sided 4 oz Mason jars are easier to build in than conical plastic cups, because you can press the jar mouth directly into the sheet of cake as a cutter instead of needing two different cutter sizes.
3 thoughts on “How to Make Dot Cakes at Home (6 Cups for the Price of 1)”