
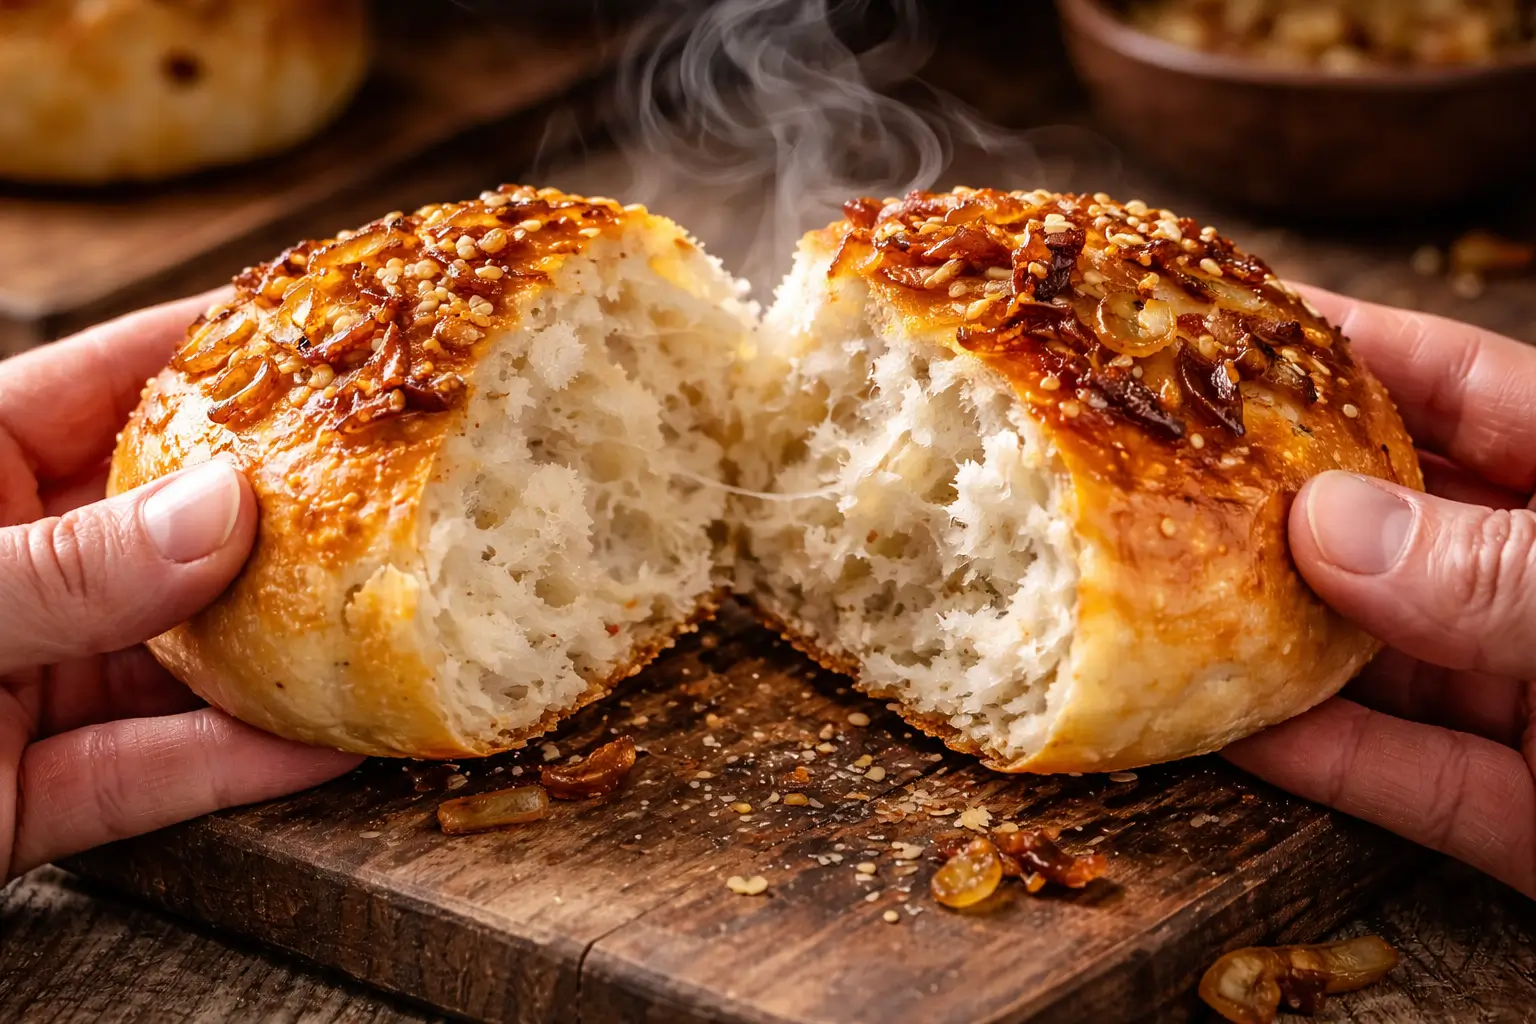
If you’ve ever walked into a Jewish deli or an old-school American bakery and grabbed a soft, golden roll with a pile of savory onions baked right on top — you already know what makes life good. That smell. That pull. That chew.
This guide covers everything you need to know about the chewy onion topped roll: what it is, where it comes from, exactly how to make it at home, and how to get that bakery-level texture that makes people ask, “Wait — did you actually make these yourself?”
Whether you’re chasing a classic Jewish onion rolls recipe, a Miami onion roll-style bake, or just want a solid old fashioned onion roll recipe to keep in rotation, this article has you covered — step by step, no fluff.
What Is a Chewy Onion Topped Roll?
A chewy onion topped roll is a yeast-leavened bread roll with a dense, springy crumb and a generous layer of cooked or raw onion baked directly into the top crust. Unlike soft dinner rolls, these are built for chew — the kind of texture that holds up to thick sandwich fillings without going soggy.
What Is an Onion Topped Roll, Exactly?
At its core, an onion topped roll combines two things: a structured bread dough (usually made with bread flour for maximum gluten development) and a savory onion topping that caramelizes slightly during baking. The result is a roll that’s chewy in the crumb, slightly crisp on the bottom crust, and loaded with sweet-savory flavor on top.
These rolls are popular across the U.S. — especially in cities with strong Jewish deli and Eastern European bakery traditions, like New York, Chicago, and Miami.
What Is a Flat Roll With Caramelized Onions Called?
The closest cousin to the chewy onion topped roll is the bialy (also spelled bialystoker kuchen). A bialy is a flat, round roll with a depression in the center — often filled with sautéed onions and poppy seeds — rather than a topping spread across a domed roll. It is not boiled like a bagel, which gives it a softer, chewier bite without a tough exterior shell.
The chewy onion topped roll you’re making here is slightly different: it’s fully round and domed, and the onion topping sits on the entire crown of the roll — not just the center depression. If you’re drawn to the world of flat onion-flavored breads, it may also be worth exploring options like a puff paratha chive onion flatbread — a layered, flaky alternative that delivers a similar savory onion hit in a completely different texture format.
What Is an Onion Bagel Called?
An onion bagel is most commonly just called an onion bagel — but if you’re referring to the flat, non-boiled version with onion filling, that’s again the bialy. Some regions also call them onion pletzl (a Yiddish term for flat bread). These are distinct products from the chewy onion topped roll, which is closer to a classic deli roll in shape and bite.
The Story Behind Onion Rolls: From Jewish Bakeries to American Tables
Onion rolls have deep roots in Ashkenazi Jewish baking traditions, carried over from Eastern Europe to American cities in the early 20th century. In cities like New York, Miami, and Chicago, Jewish bakeries made these rolls a staple — served with deli meats, lox, or simply with butter.
The Miami onion roll in particular became something of a regional institution. Miami’s Jewish community helped popularize a slightly sweeter, softer version of the roll — often enriched with a touch of extra oil and onion that was more caramelized than raw. Today, “Miami onion roll” is a style search term that home bakers use to describe that particular soft-yet-chewy balance.
The old fashioned onion roll recipe you’ll find in vintage cookbooks is typically simpler: flour, yeast, water, salt, oil, and plenty of raw onion on top. No fancy tricks. The chew comes entirely from proper dough development.
Ingredients That Make a Chewy Onion Topped Roll Actually Work
Most failed onion roll attempts come down to one thing: wrong flour, under-kneading, or onion that was never prepped properly. Here’s what you need — and why each ingredient matters.
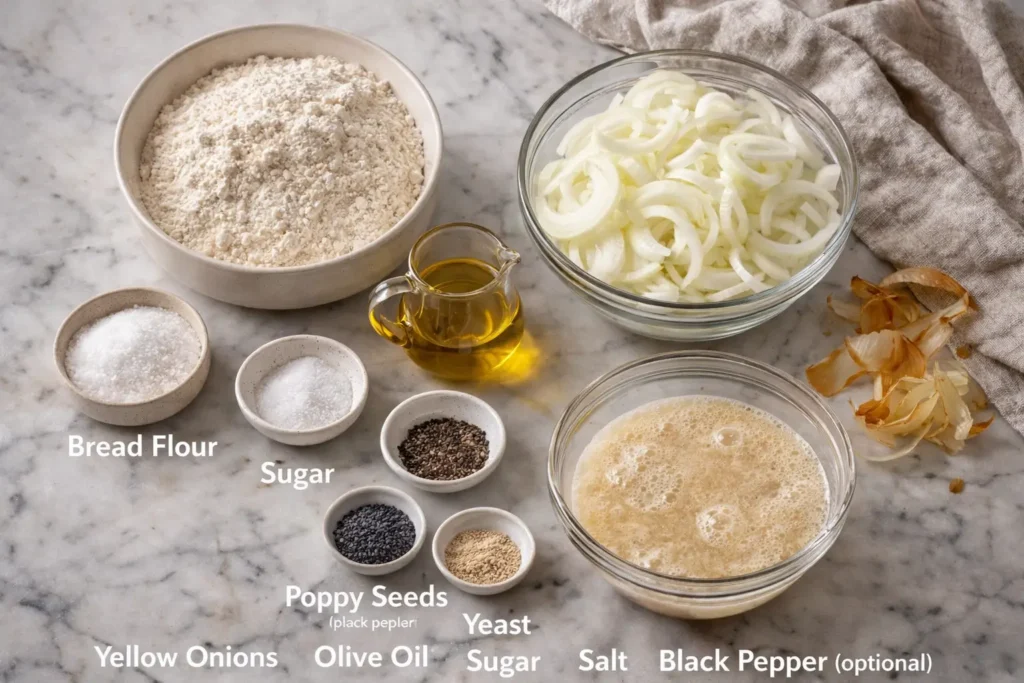
Dough Ingredients (makes 10–12 rolls)
- 3½ cups (420g) bread flour — The high protein content builds the gluten network responsible for chew. All-purpose flour can be used but may yield a softer, less structured roll.
- 2¼ tsp (1 packet) active dry yeast — Needs to be proofed in warm water first. Do not skip this step.
- 1 cup (240ml) warm water — Between 100°F–110°F (38°C–43°C). Too hot kills the yeast.
- 1 tsp sugar — Feeds the yeast and helps with browning.
- 1½ tsp fine salt — Added after the yeast activates; salt inhibits yeast when added directly.
- 2 tbsp olive oil — Adds slight richness and keeps the crumb tender without making it soft.
Onion Topping Ingredients
- 2 large yellow onions, thinly sliced or diced
- 1 tbsp olive oil
- 1 tsp salt
- 1 tsp poppy seeds (optional but traditional)
- ½ tsp black pepper (optional)
Bread Flour vs. All-Purpose Flour: A Quick Comparison
Before you grab whichever bag is on your shelf, it helps to understand what each type brings to the dough:
| Feature | Bread Flour | All-Purpose Flour |
|---|---|---|
| Protein content | ~12–14% | ~10–11% |
| Gluten development | Strong — ideal for chewy rolls | Moderate — softer result |
| Chew factor | High | Low to medium |
| Best for | Bagels, deli rolls, onion rolls | Sandwich bread, cakes |
| Availability | Most grocery stores | Universal |
Bottom line: If chew is the goal, bread flour is worth the extra step to find it. All-purpose flour will still produce a good roll — just expect a noticeably softer, less springy texture.
Chewy Onion Topped Roll vs. Regular Dinner Roll: What Sets Them Apart?
These two rolls look similar from a distance, but they eat very differently. Here’s a side-by-side comparison that explains why:
| Characteristic | Chewy Onion Topped Roll | Regular Dinner Roll |
|---|---|---|
| Flour type | Bread flour preferred | All-purpose flour |
| Texture | Dense, springy, chewy crumb | Soft, pillowy, light crumb |
| Topping | Savory cooked or raw onion | None or butter wash |
| Flavor profile | Savory, complex, slightly sharp | Mild, slightly sweet |
| Best use | Sandwiches, deli pairings | Soups, holiday tables |
| Rise time | Longer (builds structure) | Shorter |
| Shelf life | 2–3 days at room temp | 1–2 days at room temp |
The chewy onion topped roll is a working roll — built for flavor and substance. Regular dinner rolls are comfort rolls — built for softness and neutrality. They are both great, but they serve different purposes at the table.
How to Make Chewy Onion Topped Rolls at Home — Step by Step
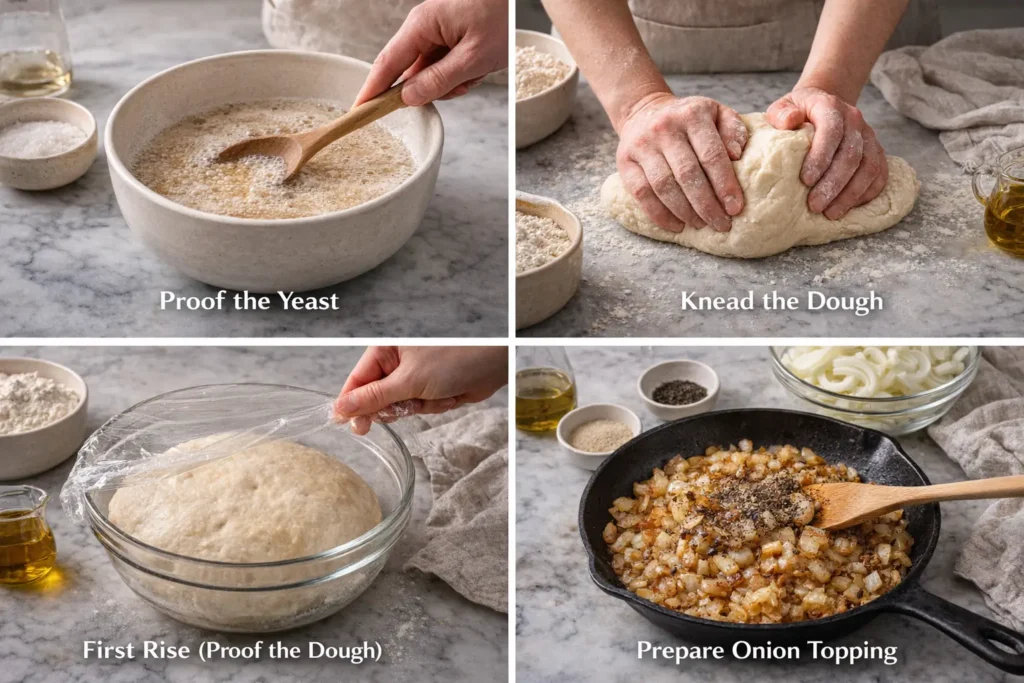
Step 1: Proof the Yeast
Combine warm water (between 100°F–110°F) with sugar and yeast in a large mixing bowl. Stir gently and let it sit for 8–10 minutes. You’re looking for a foamy, bubbly surface — this tells you the yeast is alive and active. If nothing happens after 10 minutes, your water may have been too hot or your yeast may be expired. Start over with fresh yeast before continuing.
Step 2: Mix and Knead the Dough
Add olive oil and salt to the activated yeast mixture. Gradually incorporate the bread flour, one cup at a time, mixing as you go. Once a shaggy dough forms, turn it out onto a lightly floured surface and knead for 8–10 minutes by hand — or 6 minutes on medium speed in a stand mixer with a dough hook.
The dough is ready when it passes the windowpane test: stretch a small piece thin enough to see light through it without tearing. This means the gluten is fully developed, which is what creates the chew you’re after.
Step 3: First Rise
Shape the dough into a smooth ball, place it in a lightly oiled bowl, and cover it with plastic wrap or a clean kitchen towel. Let it rise in a warm spot for 60–90 minutes, or until doubled in size.
Pro tip: If your kitchen is cold, turn your oven to its lowest setting for 2 minutes, then turn it off. Place the covered dough inside — the residual warmth creates an ideal proofing environment.
Step 4: Prepare the Onion Topping
While the dough rises, prepare your onion topping. Thinly slice or dice the onions and toss them with olive oil, salt, and pepper. You have two options here:
- Raw onion method: Use the onions as-is. They will cook and soften during baking and develop a slightly sharp, roasted flavor.
- Pre-cooked method: Sauté the onions in olive oil over medium-low heat for 12–15 minutes until soft and golden. This gives you a milder, sweeter topping and reduces the risk of the onions burning on top of the roll.
Both methods work well. The pre-cooked method is generally considered more forgiving for beginners.
Step 5: Shape the Rolls
Punch down the risen dough to release gas. Divide it into 10–12 equal pieces — a kitchen scale gives you the most consistent results. Roll each piece into a smooth, tight ball by cupping your hand over the dough and rolling it in a circular motion on the countertop with gentle pressure.
Place the shaped rolls on a parchment-lined baking sheet, spacing them about 2 inches apart. Cover loosely with plastic wrap or a towel.
Step 6: Second Rise and Add the Onion Topping
Let the shaped rolls rise for another 30–45 minutes, until they look noticeably puffier. Just before baking, brush the tops lightly with water or a small amount of olive oil to help the onion topping adhere. Spoon a generous amount of onion on top of each roll — don’t be shy. Add poppy seeds now if using.
Step 7: Bake
Preheat your oven to 400°F (205°C). Bake the rolls for 18–22 minutes, until the tops are golden brown and the onions are lightly caramelized. The bottoms should sound hollow when tapped. Transfer to a wire rack immediately — letting rolls cool on the pan can make the bottoms steam and go soft.
Pro Tips for Getting the Chewiest Possible Texture
Getting chew right in a home oven takes a few deliberate choices. These are the details that separate a good roll from a great one:
- Don’t rush the knead. Under-kneaded dough means weak gluten, which means soft and crumbly — not chewy. Set a timer and commit to the full knead time.
- Use bread flour, not all-purpose. If chew is the whole point of this recipe, this is the single biggest variable.
- Don’t over-proof the dough. Over-proofed dough loses its structure and bakes up pale and flat. When the dough has doubled — bake it.
- Steam in the first few minutes of baking. Place a small oven-safe pan with ½ cup of boiling water on the bottom rack when you load the rolls in. Steam creates a crisp exterior and supports oven spring. Remove it after 10 minutes.
- Let them cool before cutting. The crumb is still setting as the rolls cool. Cutting into a hot roll often produces a gummy texture — even when the bake itself was perfect.
Flavor Variations Worth Trying
Once you’ve mastered the base recipe, there are several directions worth exploring:
Stuffed Onion Rolls
Flatten each shaped ball slightly, add a spoonful of caramelized onions (or onion mixed with cream cheese) to the center, and fold the edges up around the filling before rolling it back into a ball. Place sealed-side down on the baking sheet. The onion filling steams inside the roll during baking.
Onion Cheese Roll
Add ¼ cup of shredded sharp cheddar or gruyère to the onion topping before baking. The cheese melts into the onion layer and creates a savory, slightly crispy crown. This variation pairs particularly well with soups and chowders. If you love that combination of cheese and onion in a handheld baked format, our cottage cheese onion ring muffin cups offer a completely different but equally satisfying way to bring those flavors together — great for meal prep or a quick snack.
Old Fashioned Onion Roll (Plainer, More Rustic)
Skip the olive oil in the dough and use a touch more water. Use raw onion only — no sautéing. This produces a drier, more bread-like roll that’s closer to what you’d find in older Eastern European-style bakery recipes. Less rich, more straightforward.
Miami-Style Onion Roll
Add 1 tablespoon of honey to the dough in place of sugar, and use slightly more oil. Pre-cook the onions until golden and slightly sweet. The result is softer and sweeter than the standard version — the Miami style tends toward that enriched balance.
How to Serve Chewy Onion Topped Rolls
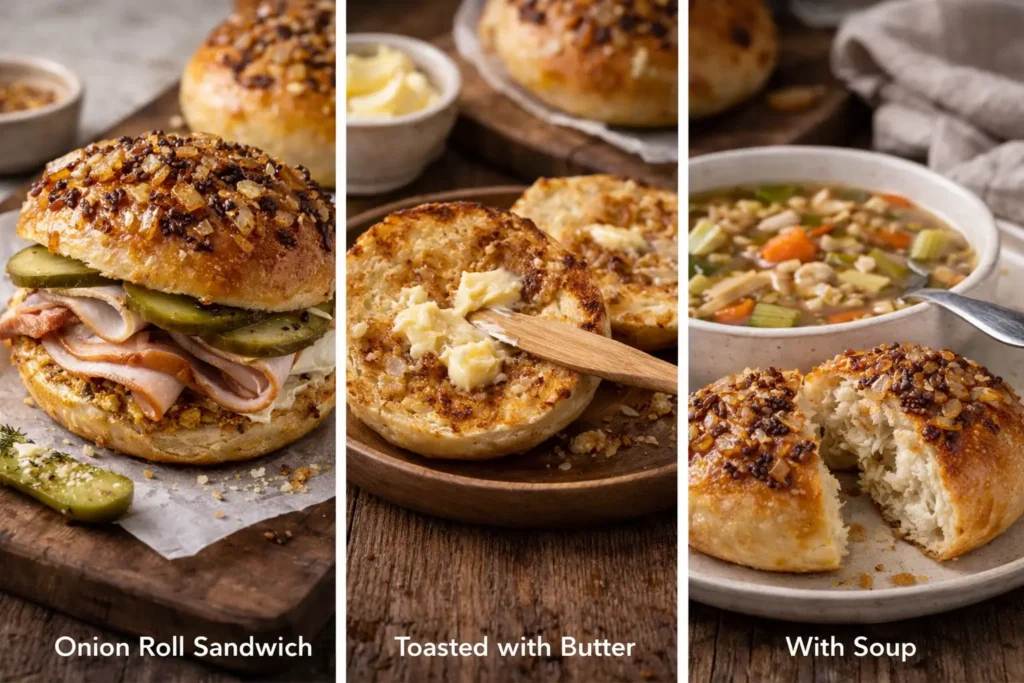
As an Onion Roll Sandwich
These rolls are ideal for sandwiches that need structure — think:
- Sliced smoked turkey with mustard and pickles
- Tuna salad with celery and capers
- Egg salad with fresh dill
- Grilled chicken with roasted peppers and mayo
The roll’s chew means it holds up without compressing into a flat disk. It also doesn’t overpower fillings — the onion flavor is present but not aggressive.
Simple Serving Ideas
- Warm with olive oil and sea salt as a side to soup
- Sliced and toasted with butter for breakfast
- As a slider bun for pulled chicken or lamb
- Alongside hummus and mezze for a casual spread
A Note on Onions and Nutrition
Onions are a flavorful, widely used ingredient across many cuisines. According to some nutritional research, onions contain compounds — including quercetin and sulfur compounds — that some studies suggest may support cardiovascular health in certain contexts.
Regarding the commonly asked question “Can onions help lower blood pressure?”: some preliminary research indicates that certain compounds in onions may have a modest effect on blood pressure in some individuals, particularly when consumed as part of a balanced diet. However, it is strongly recommended to consult a qualified healthcare provider before making any dietary changes for health-related purposes. Food alone is not a substitute for medical treatment or advice.
How to Store Chewy Onion Topped Rolls
Best Storage Methods
| Storage Method | Duration | Notes |
|---|---|---|
| Room temperature (airtight) | 2–3 days | Wrap individually to maintain moisture |
| Refrigerator | Up to 5 days | Reheat at 325°F for 5–7 minutes before serving |
| Freezer (pre-baked) | Up to 2 months | Cool completely before freezing; reheat from frozen at 350°F for 10–12 min |
| Freezer (unbaked dough balls) | Up to 1 month | Thaw overnight in fridge, then let rise 1–2 hrs before baking |
To maintain softness after reheating: wrap rolls loosely in foil before placing them in the oven. The foil traps steam and prevents the crust from drying out.
Frequently Asked Questions
What is a chewy onion topped roll?
It’s a yeast-based bread roll with a dense, springy crumb and a layer of cooked or raw onion baked into the top crust. It’s associated with Jewish deli and Eastern European bakery traditions in the United States and is characterized by its savory flavor and substantial chew.
Why is the texture of a chewy onion topped roll different from regular rolls?
The main difference is the flour type and gluten development. Chewy onion rolls are typically made with high-protein bread flour and kneaded long enough to build a strong gluten network. Regular dinner rolls use all-purpose flour and less kneading, which produces a softer, lighter crumb by comparison.
What type of onions are best for onion topped rolls?
Yellow onions are the most commonly used — they have a balanced sharpness that mellows when cooked. White onions can be used for a cleaner, slightly milder flavor. Sweet onions (like Vidalia) work well in the Miami-style variation where a sweeter topping is preferred. Red onions are occasionally used for visual contrast but can be slightly more astringent.
Can chewy onion topped rolls be used for sandwiches?
Yes — they are particularly well-suited for sandwiches because of their structural crumb. They hold up to moist fillings without becoming soggy as quickly as softer rolls do. Classic pairings in deli tradition include egg salad, tuna salad, smoked fish, and sliced deli meats.
Do you need bread flour to make chewy onion topped rolls?
Bread flour is strongly recommended for the best chewy result. That said, all-purpose flour can be substituted — the rolls will still be flavorful and well-shaped, but the texture will be noticeably softer and less springy. A small addition of vital wheat gluten to all-purpose flour (about 1 tsp per cup) can partially replicate the effect of bread flour.
How do you keep chewy onion topped rolls soft after baking?
Store them in an airtight container or sealed zip bag at room temperature as soon as they’ve cooled completely. Avoid refrigerating them unless you plan to reheat before eating, as refrigeration tends to accelerate staling in bread. For longer storage, freezing immediately after cooling (before any drying occurs) tends to produce better results than refrigerating for several days.

Chewy Onion Topped Roll (Bakery-Style Jewish Onion Rolls Recipe)
- Total Time: 1 hour 45 minutes
- Yield: 10–12 rolls 1x
- Diet: Vegetarian
Description
If you’ve ever walked into a Jewish deli or an old-school American bakery and grabbed a soft, golden roll with savory onions baked right on top, you already know the magic. These chewy onion topped rolls deliver that perfect pull, that bakery-style chew, and deep savory flavor in every bite.
Ingredients
- 3½ cups (420g) bread flour
- 2¼ tsp active dry yeast
- 1 cup (240ml) warm water
- 1 tsp sugar
- 1½ tsp fine salt
- 2 tbsp olive oil
- 2 large yellow onions
- 1 tbsp olive oil
- 1 tsp salt
- 1 tsp poppy seeds (optional)
- ½ tsp black pepper (optional)
Instructions
- Combine warm water, sugar, and yeast and let sit 8–10 minutes until foamy.
- Add olive oil and salt, then gradually mix in bread flour.
- Knead dough for 8–10 minutes until smooth and elastic.
- Place in an oiled bowl, cover, and let rise 60–90 minutes until doubled.
- Prepare onions by slicing and mixing with olive oil, salt, and pepper or sauté until soft and golden.
- Punch down dough and divide into 10–12 equal pieces.
- Shape into tight balls and place on a lined baking sheet.
- Cover and let rise again for 30–45 minutes.
- Brush tops lightly with water or oil and add onion topping and poppy seeds.
- Bake at 400°F (205°C) for 18–22 minutes until golden brown.
- Cool on a wire rack before serving.
Notes
Use bread flour for best chewy texture. Proper kneading and proofing are key. Pre-cooking onions gives a sweeter, more balanced flavor, while raw onions create a sharper, more traditional bakery-style finish.
- Prep Time: 20 minutes
- Cook Time: 20 minutes
- Category: Bread
- Method: Baked
- Cuisine: American
Nutrition
- Serving Size: 1 roll
- Calories: 210
- Sugar: 2g
- Sodium: 320mg
- Fat: 5g
- Saturated Fat: 1g
- Unsaturated Fat: 3g
- Trans Fat: 0g
- Carbohydrates: 36g
- Fiber: 2g
- Protein: 6g
- Cholesterol: 0mg
Keywords: chewy onion topped roll, jewish onion rolls recipe, miami onion roll, old fashioned onion roll recipe, onion rolls