
How to julienne an onion is a technique every home cook should master. It’s one of those kitchen skills that sounds fancy but is actually simple to learn in under ten minutes — no culinary school required. Whether you’re preparing a stir-fry, a French onion soup, or a fresh salad topping, mastering how to julienne an onion makes a real difference in both cooking and presentation.
In this step-by-step guide, you’ll learn exactly how to julienne an onion like a pro, even if you’re starting from scratch. From the right tools to the correct cutting technique and common mistakes to avoid, everything is covered so you can get clean, even strips every time.
What Does “Julienne” Actually Mean?
Before picking up a knife, it helps to understand what you’re aiming for. A julienne cut — pronounced zhoo-lee-EN — refers to slicing food into long, thin, uniform matchstick strips. In classic French culinary tradition, the standard julienne measures approximately 1/8 inch wide by 2 to 3 inches long, though the exact dimensions can vary depending on the recipe and the chef. The technique is named after a style of cooking associated with French cuisine, and it appears in professional kitchens around the world when precision and presentation both matter.
When applied to an onion specifically, the julienne cut produces thin, elegant strips that follow the natural grain of the vegetable. These strips cook quickly and evenly, caramelize beautifully, and soften without turning to mush — which is exactly why so many recipes call for them. Understanding this before you start is important, because the goal isn’t just to slice thin; it’s to slice in a consistent direction that respects the onion’s internal structure.
What You’ll Need
- 1 onion
- Sharp chef’s knife
- Sturdy cutting board
Tools You Need to Julienne an Onion
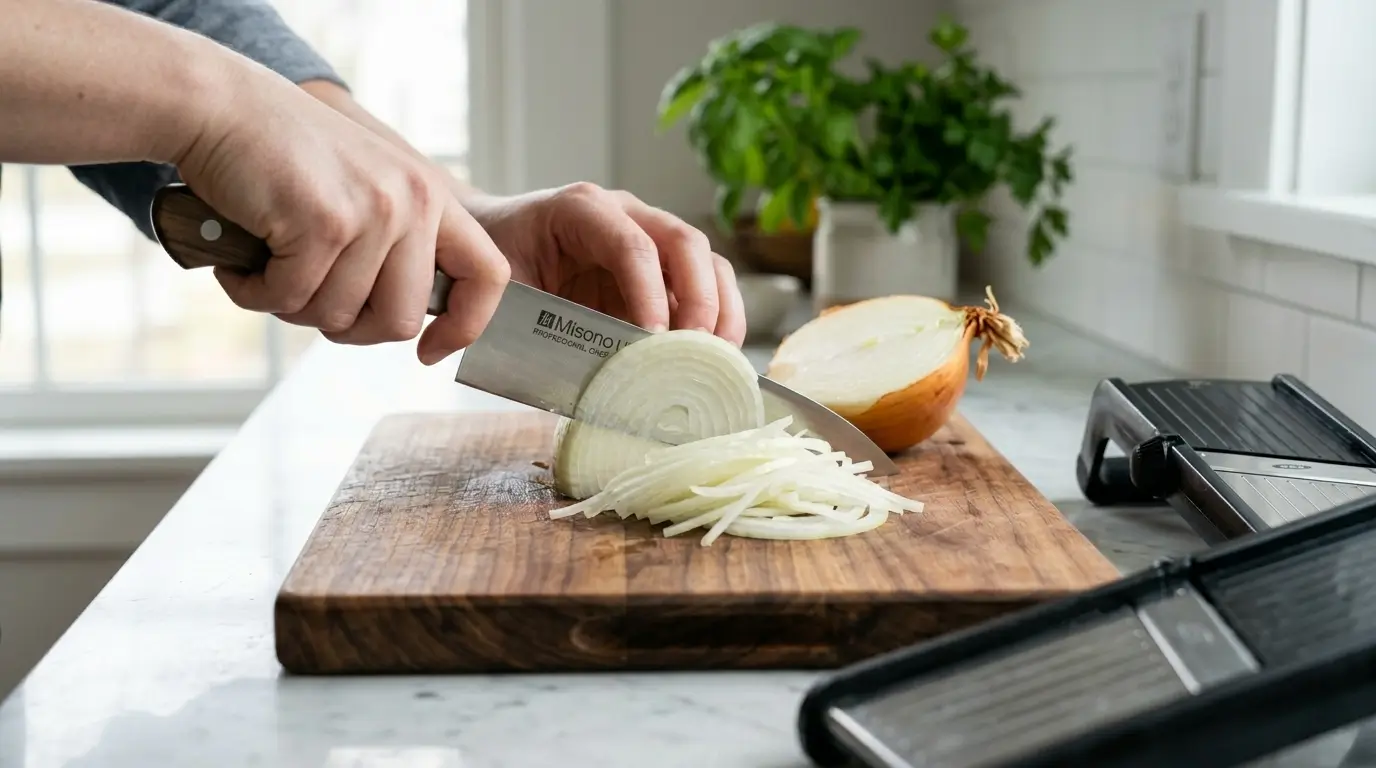
The right tool makes this cut dramatically easier. A sharp chef’s knife — ideally 8 inches — is the most versatile and recommended starting point for beginners. A dull knife is not just less effective; it is genuinely more dangerous because it requires more force and gives you less control. If your knife can’t glide through a sheet of paper without tearing, it likely needs sharpening before you attempt any fine cutting technique.
Beyond a chef’s knife, a mandolin slicer is a popular alternative that many home cooks find helpful for producing even, consistent julienne strips quickly. A dedicated julienne cutter or julienne peeler is another option, particularly useful for smaller quantities or softer vegetables. A sturdy cutting board — wood or high-quality plastic — and a kitchen towel folded under it to prevent slipping are not optional extras; they are basic safety requirements whenever sharp tools are involved.
For a closer look at the three main approaches professional cooks use for this cut, MasterClass breaks down the julienne technique step by step — including the French method, the shortcut version, and the mandolin approach.
Understanding Onion Structure Before You Make a Single Cut
One reason so many people end up with uneven, awkward slices is that they don’t stop to understand what they’re cutting. An onion is built in curved, concentric layers around a central root. Those layers have a natural grain — a direction in which the fibers run. When you julienne an onion correctly, you cut with that grain, which produces strips that hold together and have a pleasing texture. When you cut across the grain, you get shorter, irregular pieces that fall apart more easily.
The root end of the onion is your anchor point throughout the entire process. Keeping it intact for as long as possible holds the onion’s layers together while you work, giving you much more control over each slice. This is a small detail that makes a significant practical difference, especially for beginners.
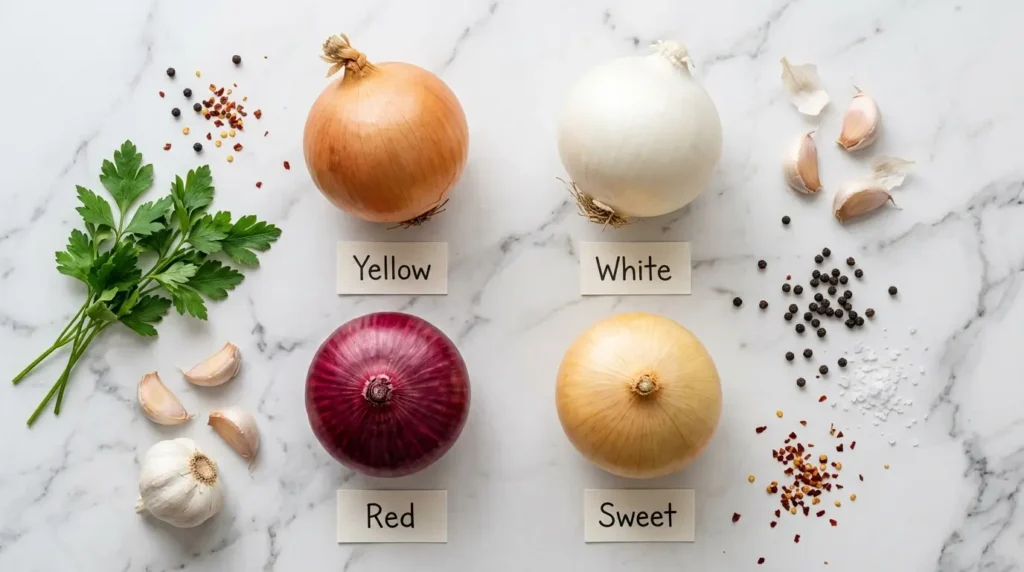
If you’re not sure whether to reach for a red onion or a yellow onion for this cut, it may help to review the differences between red onion and yellow onion — they behave differently under heat and have distinct flavor profiles that can influence your final dish.
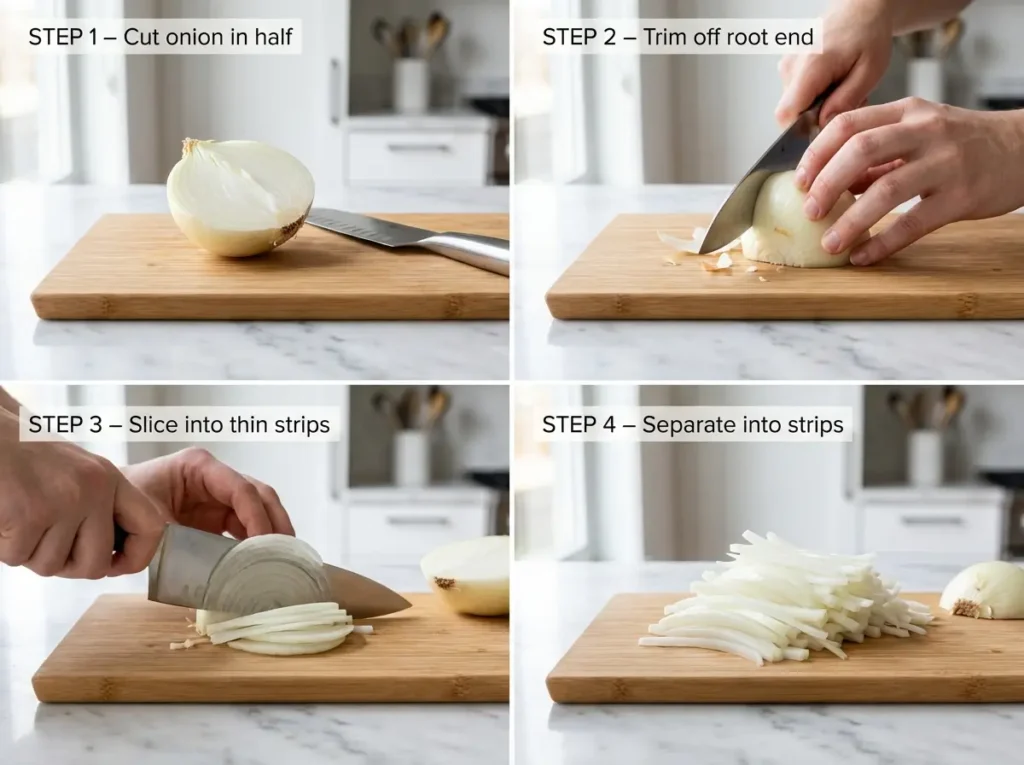
Prepare the Onion
Start by cutting off the stem end while keeping the root intact. Slice the onion in half from root to stem, then peel off the outer layers. Place one half flat-side down on your cutting board for stability.
Make the Vertical Cuts
With the onion half flat on the board, make a series of vertical cuts parallel to the root. Aim for evenly spaced slices, about 1/8 inch apart. Keep your fingers tucked in a claw grip for safety and control.
Slice Across to Julienne
Turn your knife and slice along the natural grain to create thin, uniform strips. Once you reach the root, discard it. Gently separate the slices with your fingers — and that’s how to julienne an onion like a pro.
The table below gives a quick reference for the most common knife cuts, so you can see exactly where julienne fits in the spectrum of precision cutting:
| Cut Name | Dimensions | Best Used For | Difficulty |
|---|---|---|---|
| Julienne | 1/8″ × 2–3″ | Stir-fries, salads, soups | Intermediate |
| Fine Julienne | 1/16″ × 2″ | Delicate garnishes | Advanced |
| Dice (small) | 1/4″ cubes | Sauces, soups | Beginner–Intermediate |
| Chiffonade | Thin ribbons | Herbs, greens | Beginner |
| Brunoise | 1/8″ cubes | Fine sauces | Advanced |
As this table shows, julienne sits in the intermediate range — more precise than a rough chop, but far more achievable than brunoise for the average home cook.
How to Julienne an Onion with a Mandolin
A mandolin can speed up the julienne process considerably and is worth considering if you regularly prepare large quantities of vegetables. To use a mandolin safely, always attach the food holder or hand guard before you begin — this is not a suggestion but a genuine safety requirement, as mandolin blades are extremely sharp. Set the mandolin to a julienne setting if available, or to the thinnest slice setting (typically 1/8 inch) as a starting point.
Hold the onion half firmly in the hand guard and run it down the mandolin’s surface in smooth, even strokes. Apply consistent pressure from above and let the blade do the work rather than forcing the onion. The resulting strips will be remarkably uniform, often more so than hand-cut julienne, which is why this method is preferred for large batches or dishes where visual presentation matters most.
One practical note: mandolins work best when the onion half has a flat surface to glide on. This is another reason why cutting the onion in half before starting is important. If you find the onion rocking or slipping on the mandolin’s surface, stop immediately, reposition, and make sure your hand guard is properly engaged.
Fine Julienne vs. Regular Julienne: When Does It Matter?
If a recipe specifies “fine julienne,” it is asking for strips that are roughly half the width of a standard julienne — approximately 1/16 of an inch. In practice, this level of precision is typically called for in refined French preparations, delicate Asian soups, or dishes where the onion is meant to be almost transparent rather than distinctly present. Most home recipes that simply say “julienned onion” are referring to the standard 1/8-inch cut, and it is perfectly acceptable to use that measurement across the board unless you’re working from a specifically technical culinary source.
For home cooking purposes, the most important thing is consistency within a single batch. Strips that are all roughly the same thickness will cook at the same rate, which means more even flavor and texture in the finished dish. Whether you land at fine julienne or standard julienne matters far less than achieving uniformity across all your strips.
How to Make a Julienne Cut on a Green Onion
Julienne cut green onion — also called scallions — follows a similar logic but requires a slightly different approach due to the green onion’s hollow, tube-like structure. Trim the root end and the very tips of the green tops, then cut the green onion into 2 to 3 inch segments. To julienne those segments, simply slice each piece lengthwise into thin strips. Because green onions are hollow, you may find it easiest to press them slightly flat before slicing. The result is delicate green ribbons that work beautifully as a garnish for ramen, tacos, or grilled proteins.
Tips for Tear-Free, Perfect Julienne Cuts Every Time
Crying while cutting onions is caused by a compound called syn-propanethial-S-oxide, which is released when onion cells are damaged. Chilling the onion in the refrigerator for about 30 minutes before cutting can significantly reduce how much of this compound is released. Cutting near a running exhaust fan or an open window helps disperse the gas before it reaches your eyes. Some cooks also find that wearing kitchen goggles — while admittedly not glamorous — is the most consistently effective solution they’ve found.
Keeping your knife exceptionally sharp is the other major factor. A sharp blade cuts cleanly through cell walls rather than crushing them, which means fewer irritating compounds are released in the first place. This is another reason why knife maintenance is considered a foundational kitchen habit rather than an optional extra.
Consistency comes with repetition. Your first julienne may not look like a professional’s, and that is completely normal. The technique will improve quickly with practice, and even imperfect julienne cuts will still cook properly and taste delicious.
Common Mistakes to Avoid When Julienning an Onion
The most common mistake is cutting off the root end too early. Once the root is removed, the onion’s layers separate and become difficult to control, making thin, even cuts much harder to achieve. Keep the root intact for as long as possible and only remove it right at the end.
Cutting against the grain is another frequent error. When you slice perpendicular to the onion’s natural fiber direction, you produce irregular pieces that don’t hold together well. Always orient your cuts to run parallel with the root, following the direction of the onion’s internal layers.
Pressing too hard on the knife instead of letting it glide is a sign the blade needs sharpening. Forcing the cut damages the onion’s structure and leads to uneven strips. Finally, skipping the flat-side-down step — cutting on the rounded side of the onion — makes the whole process unnecessarily unstable and is worth avoiding from your very first attempt.
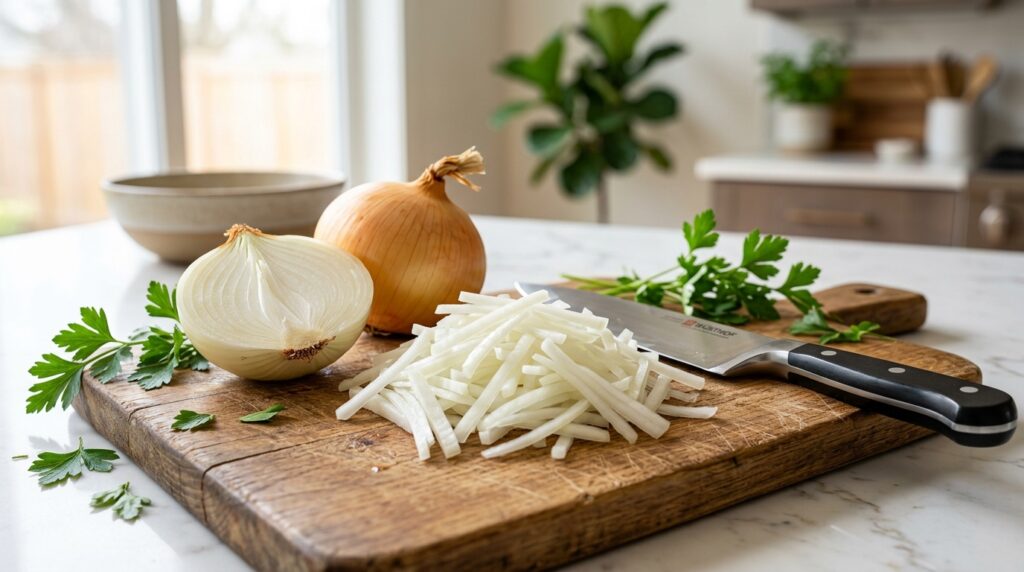
What to Do with Julienned Onions
Once you have a pile of perfectly julienned onion strips, a wide range of dishes opens up. They are a natural fit for stir-fries, where their thin profile means they cook through quickly and evenly. They caramelize beautifully in a pan over medium-low heat, developing a deep, sweet flavor that works well on burgers, flatbreads, or pasta dishes. Julienned onions are also a traditional element in French onion soup, where their shape helps them melt into the broth while still providing texture.
Raw julienned onions add a sharp, pungent bite to salads and grain bowls, and they can be quickly pickled in vinegar and sugar for a tangy topping that keeps in the refrigerator for up to a week. If you enjoy experimenting with onion-forward dishes, the what to eat with an onion boil guide and the air fryer onion boil recipe on this site offer additional inspiration for making the most of this versatile vegetable.
For dishes that call for a more refined, French-inspired approach, julienned onions pair exceptionally well with the kind of careful, ingredient-focused cooking featured in the caramelized shallot pasta recipe — a dish where the slow, careful cooking of alliums is the entire point.
Frequently Asked Questions About How to Julienne an Onion
What does it mean to julienne an onion?
To julienne an onion means to cut it into thin, uniform strips, typically about 1/8 inch wide.
Is julienning an onion difficult for beginners?
Not at all. With a sharp knife and the right technique, most beginners can learn quickly.
What knife is best for julienning an onion?
A sharp 8-inch chef’s knife is ideal for clean, controlled cuts.
How thin should julienned onion slices be?
Aim for strips about 1/8 inch wide. Consistency is key.
Why are my onion slices uneven?
This usually happens due to a dull knife, removing the root too early, or inconsistent cutting angles.
How can I stop crying while cutting onions?
Chilling the onion, using a sharp knife, and working near airflow can help reduce irritation.
Can I use a mandoline to julienne an onion?
Yes. A mandoline makes the process faster and more consistent. Always use the hand guard.
Do I need to keep the root intact?
Yes. It holds the onion together and helps create even slices.
What dishes use julienned onions?
They’re perfect for stir-fries, soups, salads, fajitas, and caramelized onion dishes.
Can I prepare julienned onions in advance?
Yes. Store them in an airtight container in the fridge for up to 2 days.