
Gluten free pizza crust recipe that actually gets crispy is harder to find than it should be. Most gluten-free pizza crust recipes turn either soggy, fragile, or cardboard-dry — and honestly, nobody deserves tragic pizza night.
Most gluten-free pizza crust recipes fall into one of two categories: the kind that turn into soggy crackers, and the kind that taste like cardboard. I know because I made both of those for a long time before I figured out what actually works.
The problem is usually one of two things: too much starch (which makes the crust crispy but fragile and flavorless) or not enough structure (which makes it soft and wet). The fix is a blend of flours that balances starch with protein, plus a few technique adjustments that make a real difference.
I’ve been making this version for two years. It holds its toppings, it has actual chew in the middle, and the edges get genuinely crispy — not just baked-hard. Here’s the full method.
Si you want a faster shortcut for busy weeknights, using store-bought dough can work too — especially if you already love this easy Aldi Pizza Dough Recipe, which gives you a great base for quick homemade pizza nights.
Why This Recipe Works
• Flour blend approach gives the right balance of crisp, chew, and flavor
• No xanthan gum needed — the psyllium husk does the binding more naturally
• Pre-baking the crust eliminates the soggy center problem
• Works with a pizza stone, baking steel, or regular sheet pan
• Dairy-free adaptable
Ingredients
Makes one 12-inch pizza crust (serves 2–3):
Flour Blend
• 1 cup (130g) white rice flour
• ½ cup (60g) tapioca starch (also called tapioca flour)
• ¼ cup (30g) potato starch
Other Dry Ingredients
• 1 teaspoon instant yeast
• 1 teaspoon fine salt
• 1 teaspoon sugar
• 1 teaspoon psyllium husk powder
• ½ teaspoon garlic powder
• ½ teaspoon dried oregano
Wet Ingredients
• ¾ cup warm water (105–110°F — warm to the touch but not hot)
• 1 tablespoon olive oil
• 1 teaspoon apple cider vinegar

Ingredient Notes
White rice flour: The base starch. Don’t use brown rice flour here — it adds a grainy texture and too much flavor.
Tapioca starch: Gives chewiness and helps the crust stretch without cracking when you shape it. This is the key ingredient that most GF crusts miss.
Potato starch: Lightens the texture and contributes crispiness. Not the same as potato flour — they behave completely differently.
Psyllium husk: This is your binder. It absorbs water and creates a gel that holds the dough together, similar to how gluten would. Use powder, not whole husks.
Apple cider vinegar: Activates the psyllium and adds a subtle tang that makes the crust taste less flat.
Pre-made GF blend: You can use 1¾ cups of a quality all-purpose GF flour blend (like Bob’s Red Mill 1-to-1 or Cup4Cup) in place of the three flours. Results may vary by brand.
How to Make Gluten-Free Pizza Crust
- Activate the yeast (optional but adds flavor): Combine warm water, sugar, and yeast in a small bowl. Stir and let sit for 5–10 minutes until foamy. If using instant yeast, you can skip this and add it directly to the dry ingredients.
- Mix the dry ingredients: In a large bowl, whisk together the rice flour, tapioca starch, potato starch, psyllium husk, salt, garlic powder, and oregano.
- Add wet ingredients: Pour the yeast mixture (or plain warm water), olive oil, and apple cider vinegar into the dry ingredients. Mix with a fork or spatula until a soft, slightly sticky dough forms. It will look wetter than wheat dough — that’s correct.
- Rest the dough: Let the dough rest uncovered for 5 minutes. The psyllium husk will absorb the water and the dough will firm up significantly.
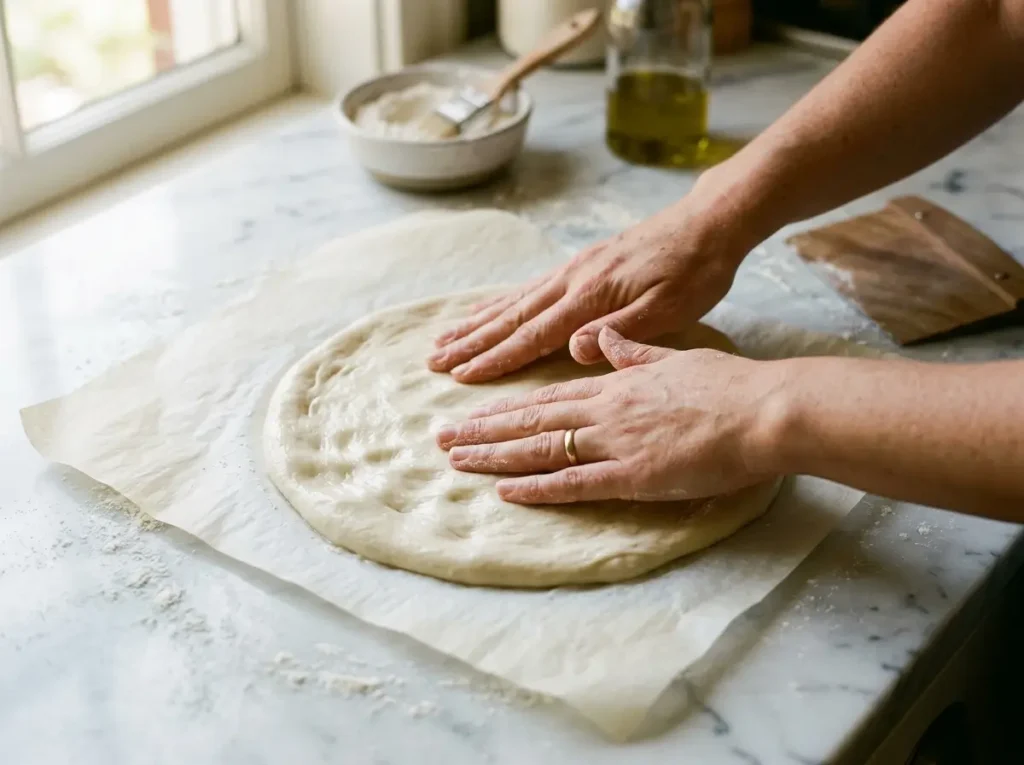
- Shape the crust: Place the dough on a piece of parchment paper. Lightly oil your hands (GF dough sticks to everything). Press and stretch the dough from the center out into a 12-inch circle. Build up the edges slightly for a rim. The thickness should be about ¼ inch — thinner than you think.
- Pre-bake: Transfer the parchment with the shaped dough to your hot baking surface (see below). Bake at 425°F (220°C) for 8–10 minutes until the top is just dry and the bottom is starting to set. Remove from oven.
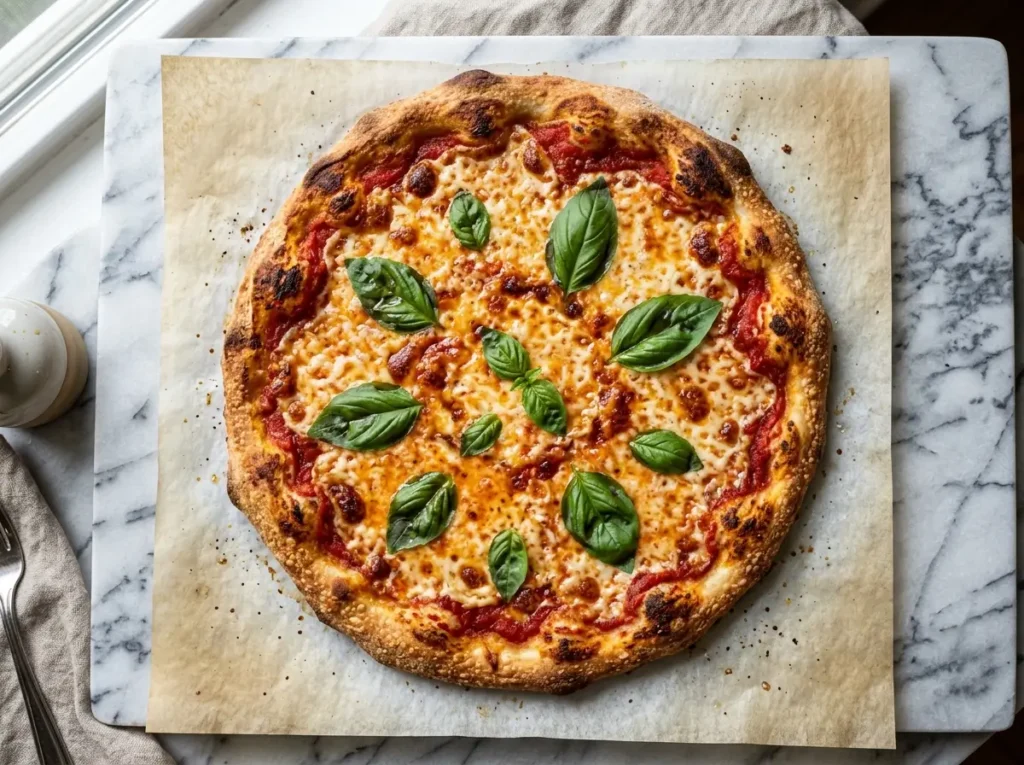
- Add toppings and finish baking: Top with sauce, cheese, and your choice of toppings. Return to oven for 10–14 more minutes until the cheese is bubbling and the edges are golden and crispy.
Getting the Best Crust — Equipment Tips
Pizza stone or baking steel (best): Preheat in the oven for at least 30 minutes at 425°F before adding the pizza. The intense bottom heat is what creates a truly crispy crust on a GF pizza.
Sheet pan (works well): Preheat the sheet pan in the oven while it heats up, then slide the parchment onto the hot pan. Don’t put the dough on a cold sheet pan — it will steam, not crisp.
Cast iron skillet: For a thick-crust style, press the dough into an oiled 12-inch cast iron skillet and let it rise 20 minutes before baking.
Sophie’s Tips
• Measure by weight, not cups — GF flours compact differently and cup measurements vary significantly. The gram measurements in parentheses give more consistent results.
• Wet hands, not floured hands — GF dough doesn’t respond to flouring. Oil or wet your hands to prevent sticking while shaping.
• Don’t overload the toppings — GF crust is less sturdy than wheat crust. Keep the toppings to a moderate amount, especially the sauce.
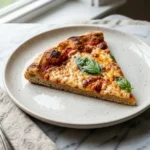
• Let it cool 2 minutes before cutting — GF pizza slices cleanly once the cheese sets slightly. Cut too early and everything slides.
Topping Suggestions
• Classic margherita: tomato sauce, fresh mozzarella, basil
• Garlic white pizza: olive oil, roasted garlic, mozzarella, fresh spinach
• Veggie: bell peppers, red onion, mushrooms, olives, mozzarella
• BBQ chicken: BBQ sauce, shredded chicken, red onion, cilantro
For an even heartier dinner version, leftover shredded chicken from this creamy Joanna Gaines Chicken Spaghetti Recipe Printable works surprisingly well as a rich BBQ pizza topping.
Storage and Reheating
Pre-baked crust: Bake the crust through step 6, cool completely, wrap in plastic wrap, and freeze up to 1 month. Top and bake directly from frozen at 425°F for 15–18 minutes.
Leftover pizza: Store covered in the refrigerator up to 3 days. Reheat in a 375°F oven for 8 minutes or in a covered skillet over medium-low heat for 3–4 minutes — the skillet method brings back the crunch better than the microwave.
Conclusion
A good gluten-free pizza crust recipe should do more than just “work” — it should actually taste like real pizza. Crispy edges, a chewy center, and a crust strong enough to hold all your favorite toppings without collapsing into sadness.
This version keeps things simple, reliable, and weeknight-friendly while still giving you that classic pizza-night satisfaction. Whether you go for margherita, veggie-loaded, or full BBQ chicken mode, the key is the same: pre-bake first, don’t overload the toppings, and let the crust do its job.
Serve it with a side like this warm Crescent Roll Garlic Bread for the full cozy dinner experience — because honestly, garlic bread and pizza are basically best friends.
Frequently Asked Questions
What is the best gluten-free flour for pizza crust?
A blend works better than any single flour. White rice flour provides the base, tapioca starch adds chew, and potato starch adds crispness. Pre-made blends like Bob’s Red Mill 1-to-1 or Cup4Cup are convenient alternatives.
Why is my gluten-free pizza crust soggy?
Two most common reasons: the baking surface wasn’t hot enough (use a preheated pizza stone or sheet pan), or the crust wasn’t pre-baked before adding toppings. Always pre-bake 8–10 minutes before adding sauce and cheese.
Can I make this crust without yeast?
Yes. Skip the yeast and increase the baking powder to 1½ teaspoons. The crust won’t have the same slight yeast flavor but the texture is good and it’s faster to make.
Does gluten-free pizza dough need to rise?
The yeast in this recipe adds flavor more than rise — gluten-free dough can’t trap gas the same way wheat dough does. You don’t need to wait for it to double in size. A 5-minute rest for the psyllium to hydrate is all that’s required.
Is this recipe dairy-free too?
The crust itself is dairy-free. Use dairy-free cheese and toppings for a fully dairy-free pizza.
Is this recipe dairy-free too?
The crust itself is naturally dairy-free, and for a fully dairy-free version, pairing it with plant-based cheese and checking smart swaps like these plant-based gelatin substitutes can help if you’re also cooking for gluten-free and dairy-sensitive guests.
The Gluten-Free Pizza Crust Recipe That Actually Gets Crispy
- Total Time: 35 minutes
- Yield: 1 12-inch pizza crust 1x
- Diet: Gluten Free
Description
A crispy, chewy gluten-free pizza crust that actually holds its toppings, with golden edges and a soft center. No xanthan gum needed — psyllium husk creates the perfect texture naturally.
Ingredients
- 1 cup (130g) white rice flour
- 1/2 cup (60g) tapioca starch
- 1/4 cup (30g) potato starch
- 1 teaspoon instant yeast
- 1 teaspoon fine salt
- 1 teaspoon sugar
- 1 teaspoon psyllium husk powder
- 1/2 teaspoon garlic powder
- 1/2 teaspoon dried oregano
- 3/4 cup warm water
- 1 tablespoon olive oil
- 1 teaspoon apple cider vinegar
Instructions
- Combine warm water, sugar, and yeast in a small bowl. Stir and let sit for 5–10 minutes until foamy.
- In a large bowl, whisk together the rice flour, tapioca starch, potato starch, psyllium husk, salt, garlic powder, and oregano.
- Pour the yeast mixture, olive oil, and apple cider vinegar into the dry ingredients.
- Mix with a fork or spatula until a soft, slightly sticky dough forms.
- Let the dough rest uncovered for 5 minutes so the psyllium husk absorbs the water.
- Place the dough on parchment paper and lightly oil your hands.
- Press and stretch the dough into a 12-inch circle, building up the edges slightly.
- Preheat oven to 425°F (220°C).
- Transfer the parchment with dough to the hot baking surface and pre-bake for 8–10 minutes.
- Remove from oven and add sauce, cheese, and toppings.
- Return to oven and bake for 10–14 more minutes until golden and crispy.
- Let cool for 2 minutes before slicing and serving.
Notes
Measure flour by weight for best results. Pre-baking the crust prevents sogginess, and using a preheated pizza stone or hot sheet pan helps create the crispiest crust.
- Prep Time: 15 minutes
- Cook Time: 20 minutes
- Category: Main Dish
- Method: Baked
- Cuisine: Italian
Nutrition
- Serving Size: 1 slice
- Calories: 210
- Sugar: 1g
- Sodium: 320mg
- Fat: 4g
- Saturated Fat: 0.5g
- Unsaturated Fat: 3g
- Trans Fat: 0g
- Carbohydrates: 39g
- Fiber: 2g
- Protein: 3g
- Cholesterol: 0mg
Keywords: gluten-free pizza crust, gluten free pizza dough, homemade pizza crust, crispy gluten free pizza